If you’re interested in photography, I’m sure you’ve heard the phrase “depth of field.” The idea has been around for quite a while. Before I ever became interested in photography, I was aware of depth of field; it seemed to be everywhere. Would you like to know the truth of it? As frequently as I heard the phrase and as much as I saw the concept in practice, I never quite knew the actual definition of it. I knew what it was, but I don’t think I could have ever explained it to anyone in any coherent way.
Let me change all that today. I’m going to do my best to alter the trajectory of your life so you don’t fall into the same trap that I fell into – practicing your photography and having all sorts of fun out there with your camera, all the while having no idea what “depth of field” means.
In today’s post, I’ll explain the basics of depth of field as it pertains to photography. I’ll give you my very own definition, I’ll talk about what effects the depth of the field and how you can use the tools at your disposal to add your own creative flair to your photos by way of blurring things out or keeping things sharp. Once you’re finished with this post, you should have the knowledge to rub elbows with the best of them at dinner parties, all the while, explaining the basics of depth of field. You’ll get the wows, trust me.
What Is Depth of Field?
Through the ages, there have been many technical definitions for this concept and through the ages, men and women have heard or read those definitions and have forgotten them about 30 seconds afterward. That’s the shame of technical things. They’re boring and people shy away from them. With this in mind, I’m going to break the concept down for you so can remember these ideas forever.
Photographers talk about a range that’s in focus when we shoot a picture when they discuss this topic. That’s fine, but let’s go one step further by tearing the phrase depth of field apart. We’ll do this my way.
Let’s pretend you’re looking through the viewfinder on your camera. It can be any camera, it doesn’t matter. They all operate similarly when it comes to this. What you see when you look through that viewfinder we’ll consider the field. The field in depth of field is the scene you see when you’re looking through your camera. Easy enough.
The way cameras work is a bit tricky. Certain things happen in the lens that can alter what is actually in focus when you look through that viewfinder. I’m sure you’ve seen those photos out there that display the foreground as blurry, the center very clear and in focus and the area to the rear blurry again. This is a prime example of how camera lenses affect the depth of field of a scene. To keep things simple, we’ll consider the in-focus area the depth part of the phrase. How “deep” is the in-focus area of your photo? What’s the sharp area’s “depth”? Let me give you an example photo to show you exactly what I’m referring to. I took this photo last night as I was trying to think of something clear to show you today. Something that would help me explain my points. Puzzle pieces are perfect for this type of thing.
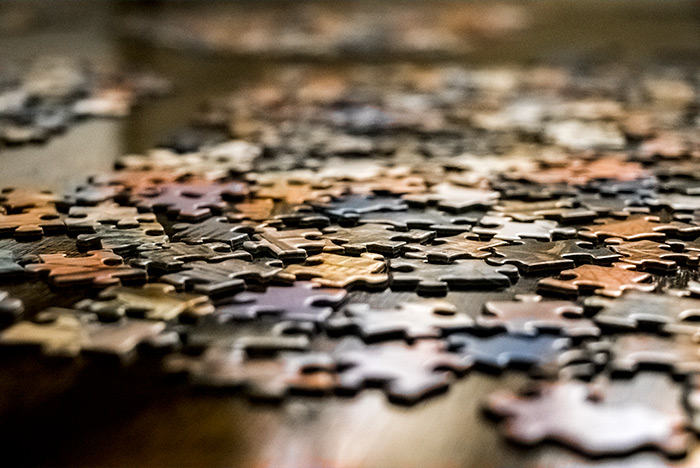
F/4.5, 1/50 second, ISO 6400, 18-135mm @ 42mm
If you’ll notice the above photo, the blur, sharp, and then blur again follows what I was stating above. Because of a few different factors, the camera lens can only really focus on one very shallow area of the scene. In this case, we’d consider this a shallow depth of field. The in-focus area is shallow, while the rest of the scene is left out of focus. So again, depth of field identifies the area of the scene that’s in focus. To have a shallow depth of field means that a relatively thin or narrow band that travels across the scene is in focus and to have a deep depth of field means that the in-focus band that travels across the scene is much fatter or wider. You can choose the terminology you’d like to use for this.
The example photo up above wasn’t the only example I took. I took many, but definitely won’t need them all here. I do want to give you another example though, this time, of a photo that has a deep depth of field. Notice the difference between this shot below and then one above.
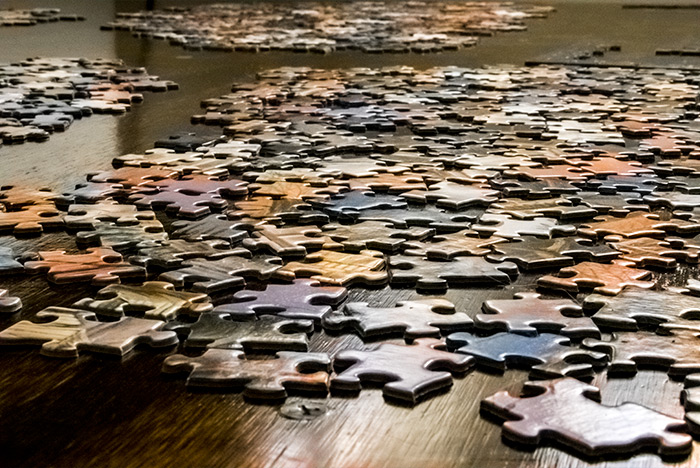
F/29, .80 second, ISO 6400, 18-135mm @ 42mm
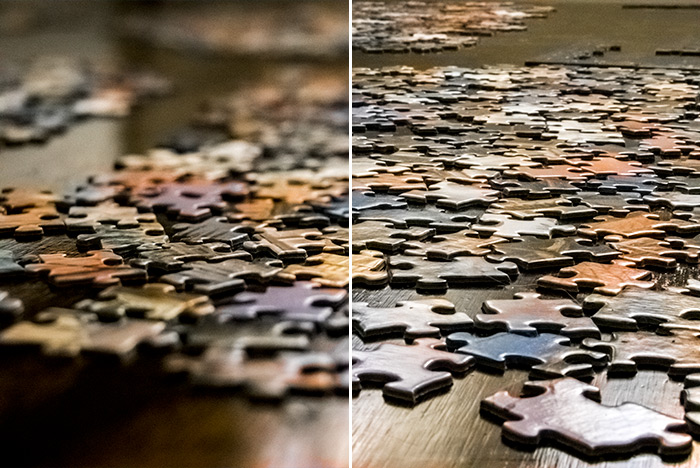
In this latest photo, almost everything is in focus. That’s interesting because I didn’t move the camera at all or zoom in or out. All I did was make one small change. Would you like to know what that change was? Read on.
But first, take a look at this nifty comparison shot I just put together.
Factors that Affect Depth of Field
I have magnifying filters that I screw on to the end of my lens when I want to take really close up photos of things. When I first began using them, I noticed that the depth of field was extremely shallow. When I say shallow, I mean, one nostril hair on a cricket was in focus and all the other ones were out of focus. I wondered why that was and then I remembered that a few different conditions cause changes in the depth of field of a scene. I’ll explain those conditions here.
Focal Length: Have you ever seen those long telephoto lenses that professional photographers use? Or perhaps you have a lens that you can zoom in really far. Focal length is the capability of a lens to magnify an object that’s far away. In general, lenses that have greater focal lengths also offer shallower depths of field. This happens for a variety of reasons, which I won’t discuss here. I’m trying to stay “focused” on the topic at hand.
Conversely, lenses with shorter focal lengths, such as wide angle lenses, offer deeper depths of field. Again, this happens for a variety of reasons.
Distance of the Camera From the Subject: If you go ahead and begin experimenting with your camera, you’ll find that where you position it in relation to your subject will alter the depth of field you see through your lens and in your photos. You may not change one setting on the camera all day long, but when you go ahead and review your photos at the end of the day, you’ll find that you’ll have a wide variety when it comes to blur and sharpness. In general, the closer your camera is to a subject, the shallower the depth of field will be. Conversely, the farther away from the subject you are, the deeper the depth of field will be, all other things being equal.
When I spoke about my magnifying filters above, this is the factor I was referring to. Because the magnifying filters allow me to bring my camera much closer to the subject than I would normally be able to, I experienced a shallower depth of field than I would normally experience. This was all because of the distance of the camera from the subject.
Aperture Size: This is the big one. This is the one everyone knows. When you switch your camera over to use its Aperture Priority mode, you’re essentially telling the camera what you’d like your scene’s depth of field to be, within reason. If you’re going for a creative shot where you’d like some blur in front and behind the subject with the subject itself being sharp, you’ll want a larger aperture. Larger apertures use lower numbers. By the way, for the first demo photo I showed up above (the one with the blur), you can see that I used a relatively large aperture. That setting was F/4.5.
If you would like to have as much clarity in your shot as possible, you’d want to shrink down the size of the aperture. Shrinking the aperture means increasing the number. In the second photo I displayed (the sharper one), I used an aperture of 29. That’s pretty small, but you see the results.
When to Use Certain Depths of Field
Of course, you can do anything you’d like with your camera and your photography, but there are some pretty simple rules to follow when it comes to setting your own depth of field. When you’re going for a creative look with blur, use a more shallow depth of field. When you’re taking a photo of something that you would like isolated in your shot, such as a person sitting for a portrait or a bird in a tree, use a more shallow depth of field. Doing this will soften the subject’s surroundings and will keep the subject clearly in focus. If you’re looking for as much clarity and sharpness as possible in the entire scene, then use a deeper depth of field. This is usually the case when it comes to landscape photography, but not always. Sometimes I like to frame a landscape in some branches and I want those branches soft. But in general, landscape shots use a deep depth of field. Really though, the sky’s the limit with this type of thing and it’s your own desire and creativity that matters.
I hope I clearly explained the basics of depth of field when it comes to photography. If you have any questions, please let me know down below.
How to Calculate Depth of Field for Photography
Now that I’ve covered the basics of depth of field, I’d like to expand upon what I’ve discussed and move towards a more refined level of photographic planning. If you’re a still life or portrait photographer, you’ll want to read this. It’s important.
When taking photos of objects that are fairly close to your camera, you’ll definitely need to contend with blur. Depth of field. Out of focus. Whatever you want to call it. The closer you get to an object, the more blur you’ll see in front of the object as well as in back of it. It’s as if this blur is magnified the closer you go. If you were outside taking landscape shots, blur caused by a large aperture wouldn’t be nearly as intrusive as it can be when you’re inside. The window where objects remain sharp gets larger the farther you move away from them.
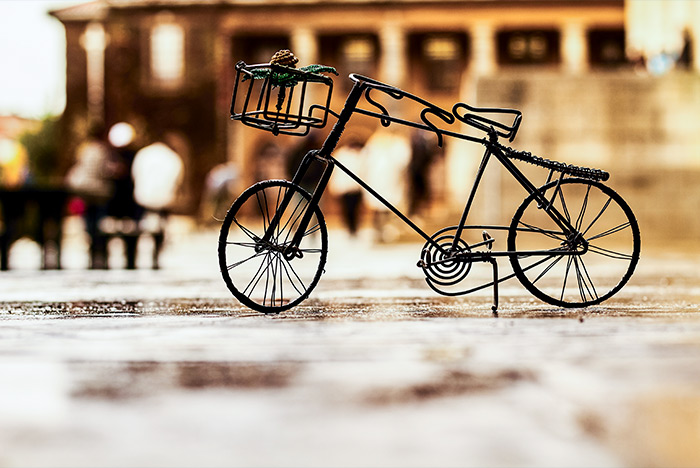
In this section, I’d like to offer you a very handy tidbit of information that will greatly assist you when it comes to determining exactly how large or small that sharp window (depth of field) will be. Depending on what type of camera you have, what your aperture size is, what your focal distance is, and how far you are away from the object you’d like to photograph, you can actually calculate how much of your subject will be in focus and how much of it won’t be. If you’re new to photography or even a well seasoned amateur, this may come as news to you. I think that once you learn this concept, you’ll have a new focus on where you position yourself and your camera as well as what settings you use. This is all fun stuff, so read on below.
How to Calculate Depth of Field
Since I’m fairly certain that there are very few people on earth who want or need to know the actual depth of field calculations as they relate to photography, I’ll skip the numbers. If you are one of the few, you can find them here. Let me warn you though, they are extraordinarily boring and there are many different calculations, depending on many different factors. Personally, I use either online depth of field calculators or apps that can be easily downloaded and used on tablets and smart phones. For most photographers, there’s no sense in pulling out a pencil and paper while attempting to engage in some marvelous photography.
I found two different only calculators that might be helpful to you. The first is called DOFMaster and the second is from PhotoPills. Both of these services do the trick. If you’d like to find your own service, simply search for “Depth of Field Calculator.” It’s that easy.
Some Calculation Examples
In this section, I’d like to go over some very realistic examples of what some of these types of calculations might look like. Let’s say that you’ve got your camera set up on a tripod that’s next to a table and on top of that table, you have a small figure that you’re photographing. I’ll give you some specs and then the results of the calculations. Here goes:
Focal Length: 55mm
Aperture Setting (F-Stop): F/16
Subject Distance: 2 Feet
Near Limit: 1.89 Feet
Far Limit: 2.12 Feet
Total DOF: 0.22 Feet
In Front of Subject: 0.11 Feet (47%)
Behind Subject: 0.12 Feet (53%)
The above information describes a situation where you’ve got a camera that’s two feet away from the object on the table. This is actually the distance from the camera’s sensor to the object. You’ve got your lens set to 55mm, which is the actual focal length, not the converted focal length for your sensor size. Most of these calculators take your camera model into account, so you won’t need to do any conversion. Finally, you have your aperture set to F/16.
Here are the results. The “near limit” is 1.89 feet. This means that this is the distance from your camera to the very closest spot in your scene that is acceptably sharp. Everything between your camera and this point will be blurry. The “far limit” is much like the near limit. It’s different though, of course. The far limit is 2.12 feet and it’s the distance from your camera to the farthest spot that’s acceptably sharp. So from your camera to the near limit is blurry (in front of the subject). Then you’ve got the area that’s sharp (the area surrounding the subject) and then you’ve got the far limit, which is the beginning of the blurry area behind the subject. The area surrounding the subject that’s sharp is called the total depth of field. In this case, it’s .22 feet, which isn’t a lot. This happens to be a very shallow depth of field.
And finally, because we’re fancy like that, we’ve got the percentages of the the distances from the focus plane to the near limit and the far limit, respectively. In this case, they are 47% and 53%.
What I’d Like to Emphasize
You can head into one of the calculators and punch in numbers all day long to get a feel of how the different variables affect depth of field. What I’d like to impress upon you in this section is how much the distance between your camera and the subject you’re photographing can truly impact the acceptable sharp area. It’s pretty crazy.
I’m going to to keep all the variables the same from my example above, except the distance between the camera and the subject. If I change the distance from two feet to six feet, the depth of field increases from .22 feet to 2.21 feet. Now, if I increase the distance to 20 feet, the depth of field jumps all the way to 38.5 feet. That’s quite impressive.
The reason I mention this is because it’s quite common for people to associate depth of field with aperture size only. While that’s a very good measure and while I’m not discounting it in any way, I’d like to just remind you that distance between your camera and the subject you’re shooting can have a profound effect on depth of field as well. I just want you to keep that in mind as you’re shopping for lenses and thinking about what type of photography you mostly engage in.
I hope I clearly explained how you can calculate depth of field as it pertains to photography. As you’re engaging in this hobby or profession, it’s helpful to know exactly how much sharp area you’re dealing with, so these calculators can prove invaluable. If you have any questions regarding this post or topic, please ask down below.
How to Preview Depth-of-Field with a Canon DSLR Camera
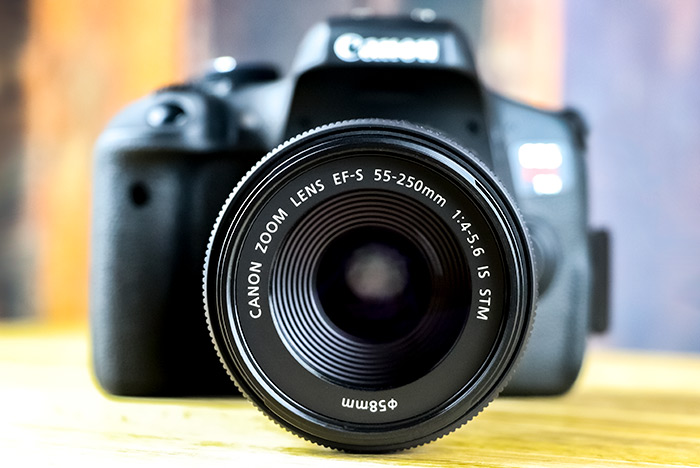
I’d like to continue on with the theme of depth of field for just a little while longer. In the above sections, I didn’t go nuts and try to explain the universe, but I did cover enough to get familiarized with what depth of field is when it comes to photography. In this section, I’d like to take things a step farther and talk about depth of field in the real world. Or, at least how we can preview it with our DSLR cameras (e.g., the Canon Rebel T2i, T3i, T4i, T5i, T6i, T7i, T8i, etc…). Most modern cameras have the capability to preview what exactly will and won’t be blurred or sharp in an image and I’ll discuss below how we can see all that in real time. For this post though, I’ll be using a Canon Rebel T6i. But really, many cameras are very similar when it comes to this function.
F/5, 1/100 second, ISO 4000, 18-135mm @ 67mm
What’s the Problem?
I can remember a long time ago when I first began playing around with my new DSLR camera. I read all about the various settings and was super excited to try them out. One particular setting, Aperture Priority mode, was especially interesting to me because I thought it would give me the ultimate creative control when it came to blurring and keeping things sharp in my photographs. While I was eventually able to harness that power, I wasn’t able to immediately. I’ll explain what I mean below.
This was the situation; I would take my camera outside, change the mode to Aperture Priority and then start shooting subjects, such as flowers and other stationary objects. I would change the aperture size every now and then to see what types of shots I could get. It didn’t take me long to realize that as I was taking these photographs, the resulting images didn’t look anything like what I saw through the viewfinder or the live view screen on the back of the camera. I was purposefully going for a specific type of blurry look in the foreground and background sometimes and a much more sharp one other times. What I noticed was that the camera showed me the same exact preview through its two preview methods with every single photo I took. I thought something was broken.
The Reason Cameras Do This
When previewing a photograph, you need to be able to see things brightly and crisply and as easily viewable as possible. If you’ve got the aperture set to its smallest size, not much light is going to come through the lens. That’s going to darken the scene down quite a bit as you’re looking through your camera or at the rear screen. When you have the aperture set to something quite small, such as F/22, the camera’s shutter speed is going to need to compensate for that lack of light by staying open much longer than it normally would as it’s taking the photo. Because you can’t preview shutter speed, you’re left with just the aperture size preview, which might be too dark to do you any good. I hope I’m being clear here. If I’m not, simply ask me to clarify.
Because camera manufacturers think it’s more important to have a nice bright preview before a photographer takes a photograph, they’ve chosen to show that preview while the aperture is wide open. That way, as much light as possible will come through the lens and everything will be great. Except for those occasions that you actually want to see what an Aperture Priority shot will look like after it’s taken. In those cases, you’ll need to take an extra step.
Previewing Depth of Field
If you’d like to preview the depth of field of your photograph before actually taking the photo, you can. It’s not a problem at all. Take a look at this next photo I share below.
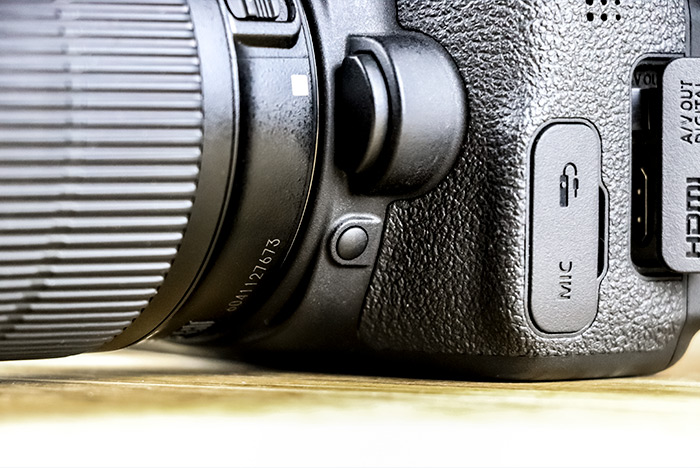
In this photo, there are a few buttons. The large one located in the center top area is the one that you would push if you wanted to remove the lens. Do you see the smaller button right beneath it? This one is called the Depth of Field Preview button. If you were to press this button after setting up a shot and then look through one of the preview methods on your camera, you’d see the scene’s depth of field change to what it would actually look like after the shot was taken. This button allows the scene to be displayed through the actual aperture setting in the lens. Now, as a word of warning, it may not appear as you intend and I’ll explain why next.
What Will You See?
If you already have the aperture setting set to its largest size and then press the Depth of Field preview button, you’re in good shape. You won’t see much of a change at all. It’s only when you begin increasing the aperture number (shrinking the actual aperture size) that things get a bit difficult to see. As I mentioned above, we can’t preview shutter speed and that’s what’s required to compensate for a small aperture. So as you shrink your lens’s aperture down, your preview will get darker and darker. The scene will become more sharp, but it probably won’t do you much good if you can’t see it. If you’re in a very bright area, you may have a chance, but if you’re in a low light setting, this feature might not do you any good. You may need to use another method which is called trial and error. This is just a “take a shot and review it” approach. I’m sure you’re used to this one already. Overall though, this is a handy feature to have and I think you’ll find it useful if you ever need it. Just keep it in mind.
I hope I clearly explained how to use the depth of field preview button on your DSLR camera and I hope I gave you some good background information as well. If you have any questions, please let me know in the comment section down below. Thanks for reading!
What is Hyperfocal Distance?
I’ve been bumping into this phrase on the internet lately (for some reason), so I thought I’d write a quick bit that discusses exactly what it is. Many of you have never heard of “Hyperfocal Distance” before because it’s a step beyond regular camera focus and depth of field, but it’s actually quite an important concept to grasp. Every photograph needs to be in some sort of focus, so it’s helpful to understand exactly how that focus works and how you can set the depth of field to your advantage so everything you want to be sharp in your photos is actually sharp.
This is a good definition of hyperfocal distance: the distance between a camera lens and the closest object which is in focus when the lens is focused at infinity.
I guess you can sort of say that this phrase describes the distance at which your camera needs to be from an object in order for it to “hyper” focus. And that “hyper” means to focus at infinity or forever.
Since this is a concept that’s difficult you wrap one’s head around, I’ll try to explain it in the most simple way I can. As you may already know, there are a few things that dictate the blur in a photograph. The actual focus and the depth of field in the scene that’s created by the distance from an object as well as the aperture size inside of the lens. Let’s forget about focusing for now. We’ll pretend that the point of focus is, in fact, in focus. So what we’re left with is the distance and the aperture size.
Did you know that there is an app that provides the necessary calculation for hyperfocal distance? I just wanted to put that out there. There are actually a few. One is called HyperFocal Pro. Search for that on Google Play Store. There are tons of other resources that can help with this calculation as well. To find them, search “Hyperfocal Distance tools and apps” on Google or Bing.
You may not even need to think about hyperfocal distance unless you’re shooting landscape photography or something similar. Basically, situations where you need the foreground as well as the background in focus. The problem with simply pointing an shooting in situations like these is that it’s difficult to tell whether the mountains in the distance are actually as in focus as the leaves that are right in front of your face are. There’s a calculation that needs to be made that tells you how far away from the leaves you need to stand and at what aperture you need your lens to maintain focus (depth of field) all the way through. Again, the distance from an object as well as aperture size matters. To get a quick glimpse of what I’m talking about, check out this depth of field calculator. It’s got the hyperfocal distance value included.
Here’s another way to think about what hyperfocal distance is. It’s the focus distance that places the farthest edge of a depth of field at infinity. So if you were to focus on something in your scene and that’s the closest object you could focus on before the objects in the distance became soft, you’d have found your hyperfocal distance. If you moved your camera closer to the object you’re focusing on or try focusing on something closer to the camera, the objects in the distance would lose focus. It’s strange how these lenses and apertures work, but once you understand the fact that there actually is a setting and position that can offer you an infinity focus, it all begins to come together. All that needs to be done then is to calculate what aperture size you need to set your lens to and how far away you need to stand from the object in the foreground you’ll be focusing on.
There are a few methods available for keeping things in the distance sharp as well as maintaining focus on foreground objects. You can always download an app for your phone or you can use an online calculator tool. In reality though, these things take time and it’s not likely that you’ll be out in the field photographing while looking at the internet. So, something more intuitive and realistic might be better.
Here’s a tip: Focus your camera on the most distant object in your scene. Then, adjust your focus as close as you can to yourself while keeping the distance in focus as well. You’ll see the in-focus areas change fairly obviously. When you do this, you’ll have found your hyperfocal distance. To get a feel for the distances I’m referring to, you can play with the many hyperfocal chart calculators available out there. Here’s a pretty good one.
I know this is a tricky topic, so please ask me questions down below. Perhaps if you ask a question, I can explain it better. Thanks!

Leave a Reply