Have you ever seen a video playing while another video is playing in a smaller box somewhere in the original video’s space? That’s called picture in picture and putting together something like this using DaVinci Resolve is easier than you think. Whenever I see fancy techniques like this one, I get intimidated. I really shouldn’t because all something like this takes is a few steps. In this tutorial, I’ll show you how to create a picture in picture video using Resolve.
There are only a few things to do when creating a picture in picture feature for your video. Here they are:
- Drag your video clips to the timeline.
- Stack the video clip you’d like to be the smaller on top of the larger.
- Resize the smaller clip to the proper size using the Transform tool.
- Move the smaller clip to the preferred location in the video.
That’s pretty much it! So, if you can place clips on the timeline and if you know how to access and use the Transform tool, you already know how to complete this task. Below, I’ll go through a quick project to show you exactly how it’s done.
Placing the Video Clips
To get started, I’ve already dragged a few demo clips to my project in Resolve. My project is very short. Take a look at my timeline.
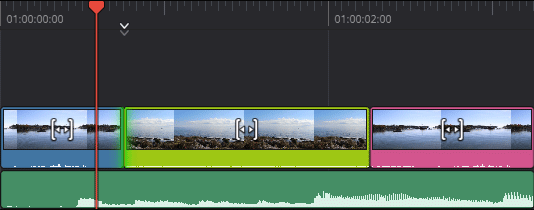
My goal is to have the pink clip be the smaller window that plays while the larger yellow clip is playing. To make this happen, I’ll need to click and drag the pink clip so it’s above the yellow one. As I click and drag, the pink clip will lighten in color.
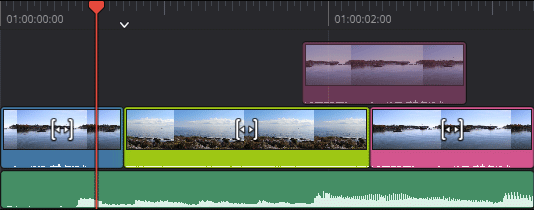
I’ll position the pink clip directly above the yellow. After I drop the clip, it’ll return to its normal color and will disappear from its original position.
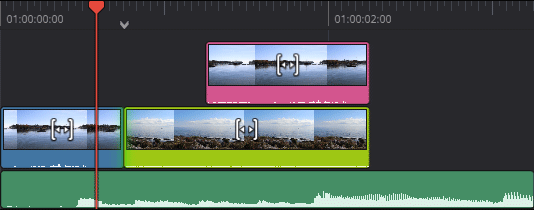
Now that that’s done, I’ll move on to the next step.
Resizing Using the Transform Tool
To resize the pink clip, I’ll use the Transform tool. To access it, I’ll click the Tools button below the monitor.

When I click that button, the Tools toolbar will appear beneath the monitor, directly above the Tools button I just clicked. As you can see from the graphic below, the Transform tool is already selected. I circled it in red.

If you look below the Transform tool button, you’ll see fields with values in them. To change those values, simply click and drag on top of the values to the left or the right. You’ll see the bounding box move or reshape as you drag. The bounding box I say? Yes, let’s take a look at that in the monitor.
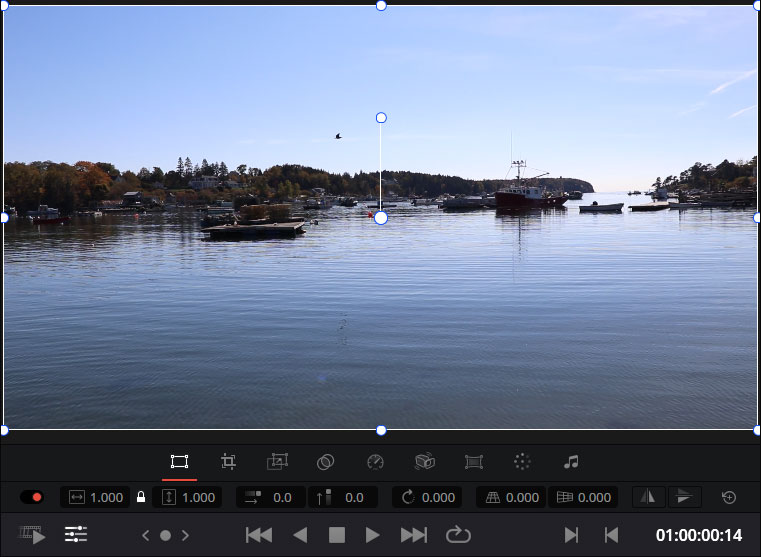
To resize the bounding box (video clip), I’ll click and drag one of the corners. But first, I’ll select the pink video clip in the timeline and move the timeline so that clip is showing in the monitor. Then I’ll click and drag.
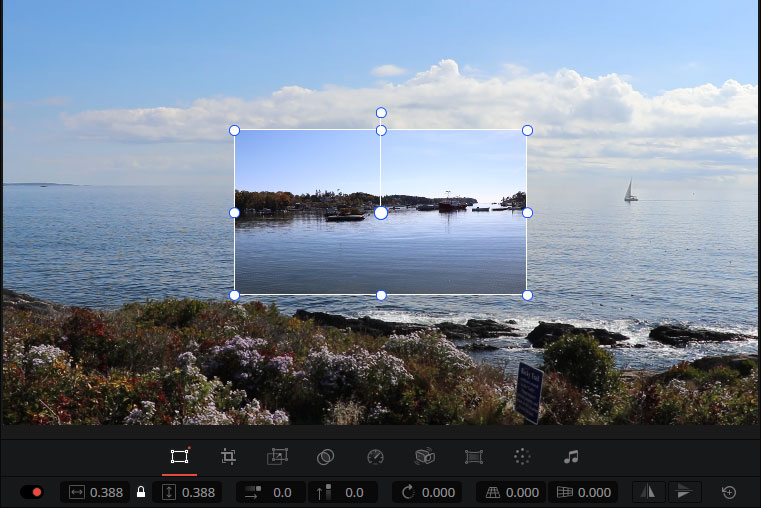
If you look at the first two values in the fields below the toolbar, you’ll see that they changed. They used to be 1.000 and now they’re 0.388. Those are the new size dimensions.
Here’s the thing. If I go to the Inspector link in the upper right area of the workspace and click to open the Inspector panel and then click to expand the Transform section, I’ll see the same values.
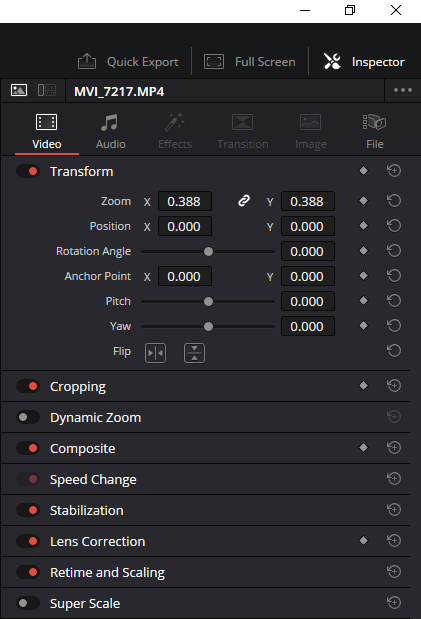
If the same values are accessible in the Inspector, couldn’t I just have used it to complete this task? Yes, I could have, if I had the exact dimensions that were required to resize the clip. Otherwise, it’s much more simple to click and drag until the size looks good. That’s why so many people prefer to use the Transform tool in the monitor.
Moving the Transformed Clip into Position
The final step is easy. All I need to do now is click anywhere on the smaller clip and drag it to the position I’d like to see it. After that, I’ll click on the Tools button below the monitor again. That will hide the bounding box as well as the Tools toolbar. Let’s see how the video looks now.
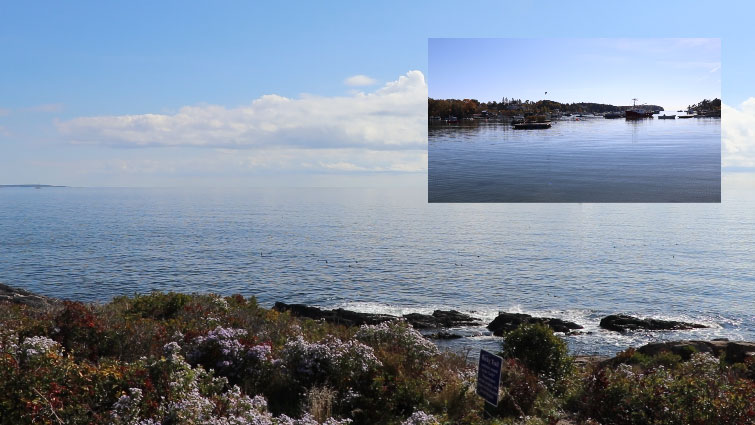
That’s all there is to it. Now if I play the video back, I’ll see both of these clips play simultaneously.
If you have any questions regarding how to create a picture in picture using DaVinci Resolve, please ask in the comment section below. Thanks!
If you’d like to learn more, click through for all of my free DaVinci Resolve Tutorials.