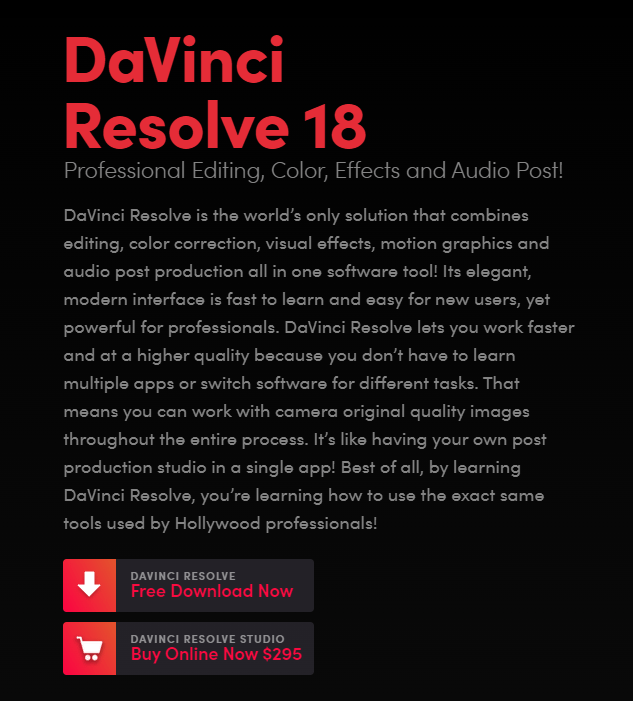
There are a handful of video editing applications available to the regular, or common, user, such as myself. When I say regular (or common), what I mean is the amateur. Or the non-professional. And actually, if you look into what applications such as Adobe Premier Pro, Adobe Premiere Elements, Sony Vegas, Pinnacle Studio, Apple iMovie, Apple Final Cut Pro, Corel VideoStudio, or DaVinci Resolve offer, they actually can be used by professionals in Hollywood and beyond. The reason I say they’re accessible to us is the price. They’re all affordable. One is the most affordable though and that one is DaVinci Resolve. The basic version is free and the pro version (DaVinci Resolve Studio) is sold for only $295. Even at $295, what you get is a steal. Just wait until you continue reading through my remaining tutorials on this application to see what it has to offer. It’ll blow your mind. And I only cover what’s available in the free version. It’s insane.
DaVinci Resolve is available for both PC and Mac. Since I operate a Windows PC, in this post, I’ll cover how to go about downloading and installing the application on a PC. The instructions are nearly the same for Mac, so read through and if you have any questions, just let me know.
How to Download & Install DaVinci Resolve on Windows PC
Follow these fast instructions to download to and install DaVinci Resolve on your computer.
The Quick Instructions
- Visit the Blackmagic Design website.
- Find and click the link for DaVinci Resolve.
- Find and click the link that says “DaVinci Resolve – Free Download Now.”
- Click the appropriate button for the system you’re downloading to.
- Type your details into the form that appears. This will register your product as well as download it.
- Install the application and get to work.
Now let’s look at a much more detailed view of the above instructions for downloading to and installing DaVinci Resolve on your Windows PC computer.
The Detailed Instructions
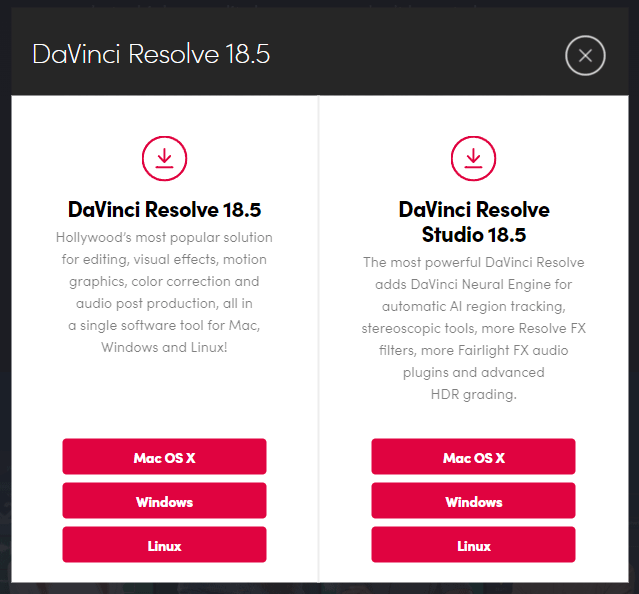
In order to download DaVinci Resolve, you’ll need to visit the Blackmagic Design website, and more specifically, the Resolve page itself. At the time of this writing, Resolve’s version is up to 18.5. This is the link to the Resolve page on the Blackmagic Design homepage.

On the Resolve page, you’ll notice a few download links. One is for the free version of the application and one is for DaVinci Resolve Studio, the paid pro version (both links actually do the same thing). If you’d like the free version, go ahead and click the corresponding link.
Once you click the link, you’ll be presented with a few options. Again, you can choose the free or paid version, but this time, you’ll need to choose which system you’d like to download to. In my case, I chose Windows on the left, free, side.
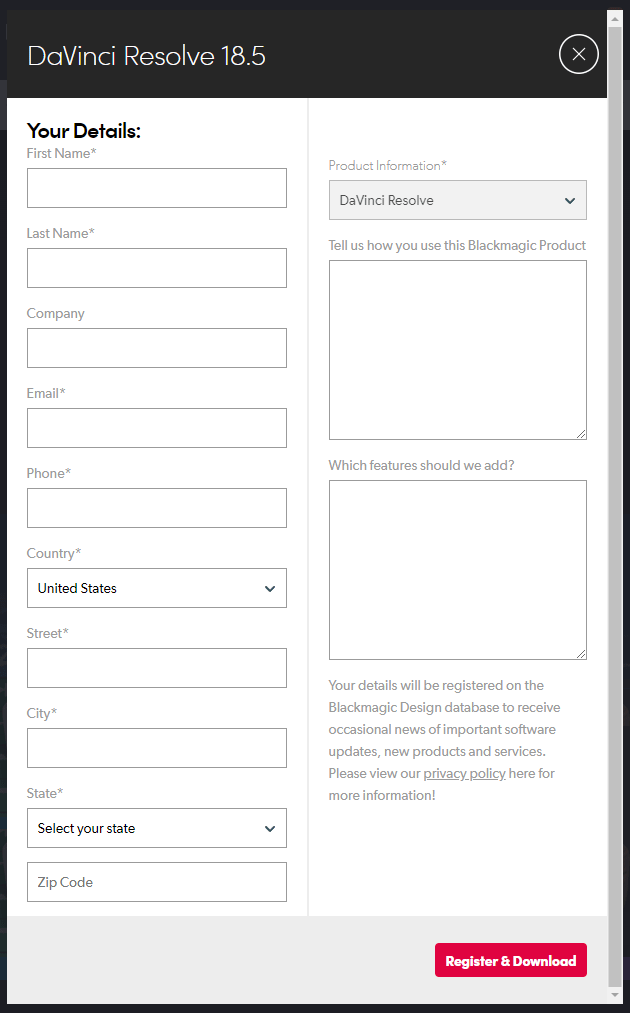
When you click the button, you’ll be presented with a product registration form. Go ahead and fill in the form and then click the Register & Download button. This will initiate your download.
Resolve downloads as a zipped file. Once downloaded, located the zipped folder on your PC and then extract the contents. Double-click the installer file and when the installer window opens, click the Install button.
After Resolve installs on your computer, the program will tell you that you need to restart your computer before using the application. I didn’t do that and everything seemed to work fine. I later restarted my computer and nothing changed; everything was fine. So my advice to you is to simply ignore any stubbornness and restart the computer.
Once this is complete, you can double-click the Resolve icon on your desktop to begin work. Looking for more? Visit my Tutorials page to learn how to use DaVinci Resolve. Good luck!
Leave a Reply