Adding transitions to clips in the Cut page of DaVinci Resolve is as easy as clicking a button or clicking and dragging. There are a few nuances you’ll need to know though and that’s what I intend to cover in this tutorial. If you’re interesting in learning how to add transitions to your project timelines, read on.
Where Are Transitions Located?
To access the available transitions on the Cut page, you’ll need to click the Transitions link in the upper left portion of the workspace.
You can scroll up and down to see all of the transitions. Most are available in the free version of Resolve, but for some more advanced transitions, you’ll need to upgrade to the paid version. If you attempt to use a limited transition, you’ll be prompted to upgrade with a message.
The Button Push Method
In the above graphic, you’ll notice two red ovals. Inside the top oval is the Transitions link you’ll need to click on to access the transitions. Inside the bottom oval are three buttons. I’ll get to those buttons in a moment. To add a transition to a clip in the timeline, you’ll first need to click on the desired transition to select it.
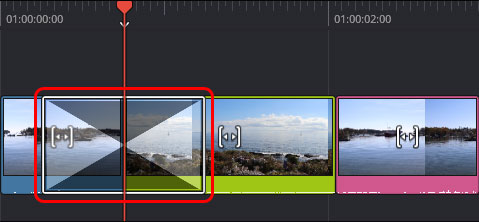
Then, you’ll need to move your timeline so your playhead is near the insertion point of the transition.
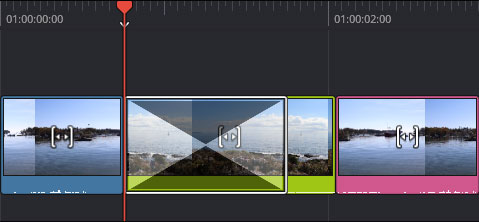
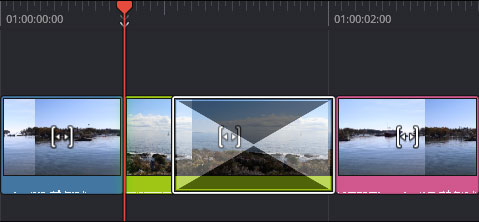
And finally, you’ll need to push one of the three buttons inside of that bottom red oval. The left button inserts the transition at the end of a clip, the center button right at the break between two clips, and the right button at the beginning of a clip.
Mind you, you’ll need to make sure you click to select your desired transition inside the Transitions panel before you click any of those buttons. If you don’t select a transition first, you’ll be using the standard transition, which might not be the one you want to use.
The Click & Drag Method
Clicking and dragging is even easier than the button push method. Again, you’ll need to access the Transitions panel, but this time, instead of selecting the transition and clicking one of the buttons in the toolbar below, all you’ll need to do is click a transition to select it and then drag it down into the clip in the timeline. When you do this, hover your mouse pointer over the space in the clip you’d like to see the transition. As you hover, you’ll see the transition appear. If you’re happy with its placement, simply drop to apply. It’s that easy. I’d give you some screenshots of this process, but they look exactly like the ones in the above section.
And that’s it! If you have any questions regarding how to apply transitions in the Cut page of DaVinci Resolve, please ask in the comment section below.
If you’d like to learn more, click through for all of my free DaVinci Resolve Tutorials.
Leave a Reply