After downloading and installing DaVinci Resolve, you’ll need to create a new project in order to move forward. I’ll cover how to do that in this post.
The New Project Panel (Home Page)
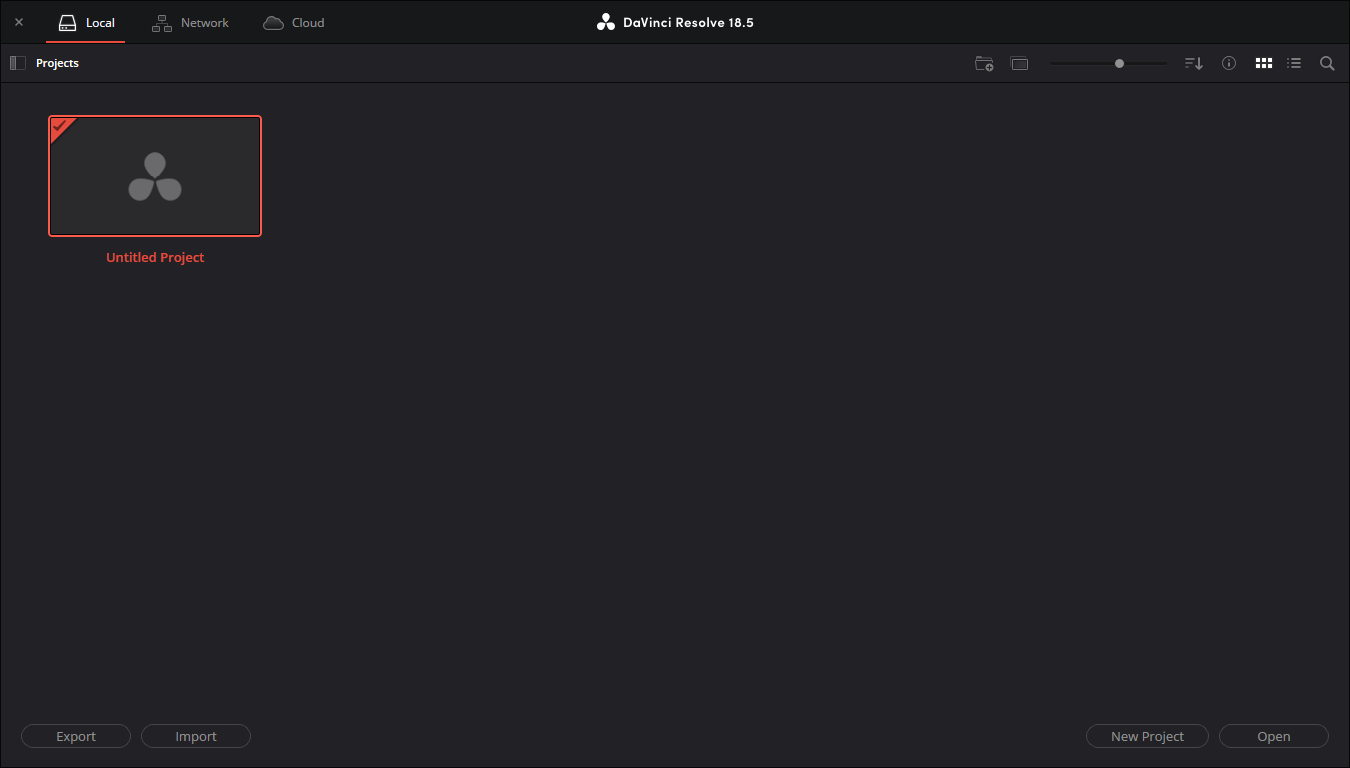
Upon launching DaVinci Resolve, the New Project panel or Project Manager will appear. This is what it will look like. It’ll actually open before the rest of the application opens.
The Project Libraries Panel
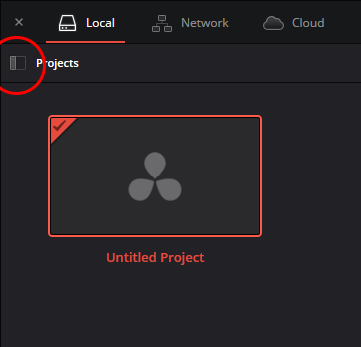
If you click the Show/Hide Project Libraries button in the upper left corner (to the left of the Projects title), the Project Libraries panel will appear. You can see the button in the next graphic.
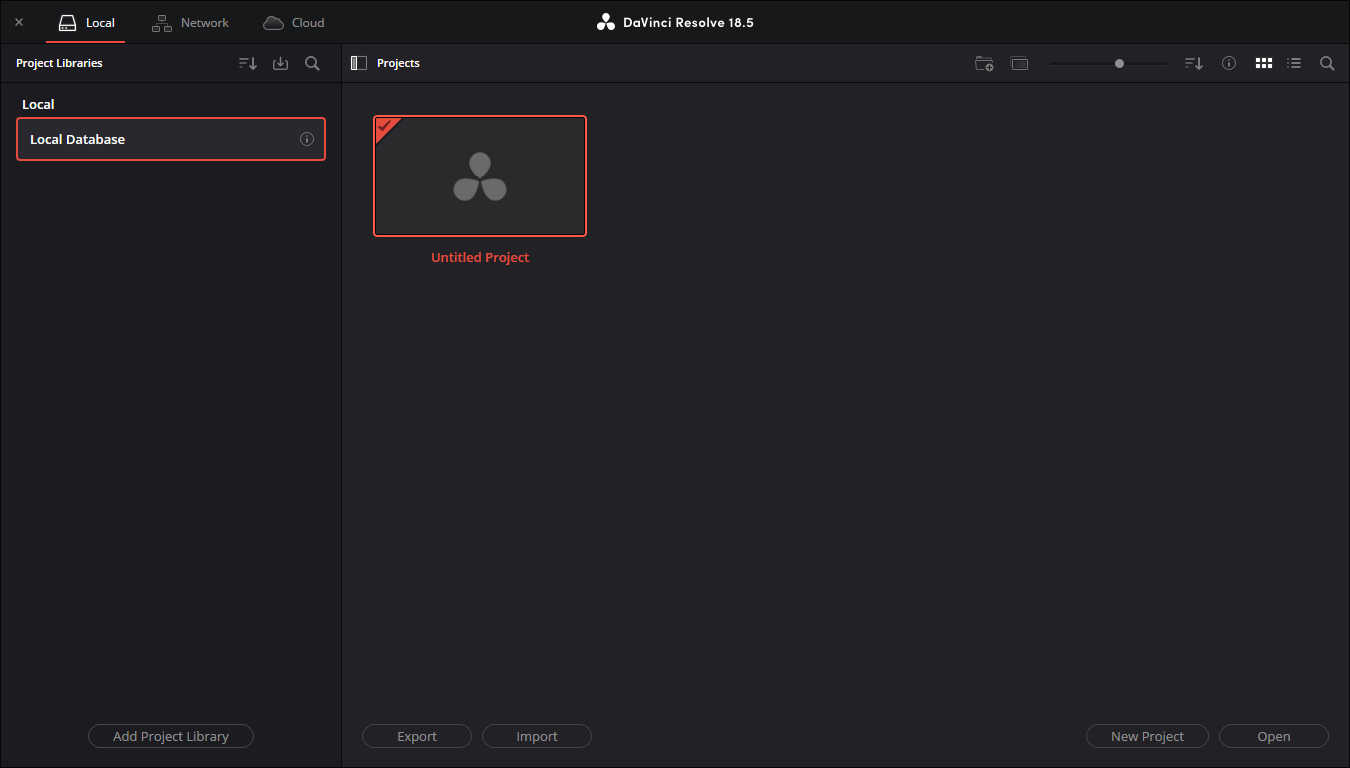
And here, you can see the Project Libraries panel as well as the Projects panel.
Project Libraries
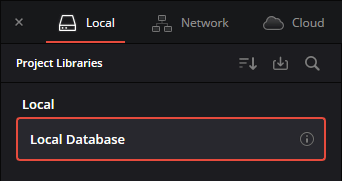
Part of the DaVinci Resolve installation process includes the creation of a project database. This isn’t something you need to concern yourself with. It’s creation was automatic and the database can grow in size to hold all of your projects. You can see the database in the below graphic. The Local label means the database is stored locally on your computer or external storage and the current database (or library) is named Local Database.
You need to be aware that this database will contain just the data that is used as you create your projects. It won’t contain the assets you’ll include in your projects, e.g. video clip files, audio files, image files, etc… Those types of assets will be stored on your system or external storage somewhere. The database is merely used as a place to keep and organize your files.
Adding New Project Libraries
Also, if you’re a power user and you’ve got a large number of projects and you’d like to organize them into different libraries, you can do that. Just click the Add Project Library button that’s located at the bottom of the Project Libraries panel.

When you click that button, another panel will appear. This panel is called the Add Project Library panel.
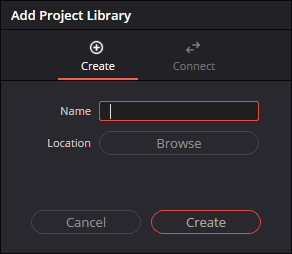
To create a new library, fill in the Name field with your desired name and then click the Create button. You’ll see the new library added to the Project Libraries panel.
How to Create a New Project in DaVinci Resolve
As I said above, in order to do any work in DaVinci Resolve, you’ll need to create a new project. Think of a project as a working file. It’s where you’ll do all your editing and ultimately, rendering. Creating a new project in Resolve is easy. All you need to do is follow these simple instructions.
Renaming a Project
There are a few options available to you when creating a new project. First, you can actually just double-click on the existing project in the Project Manager that’s called Untitled Project and that will open up into the DaVinci Resolve workspace. The problem with that is that you’ll end up having a project called Untitled Project and who wants that?
If you wanted to, you could right-click on the project in the Project Manager and choose Save As… This would open a dialog box that would allow you to enter a new name for the project and save it out. What’s actually happening is that you’re copying the current project and saving new, which isn’t what you probably want to do. One thing to note – if you’re currently working on a project and save it as another name, it’ll change the project name inside of the open version in Resolve, meaning, your current project will change names.
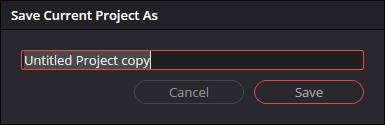
After you enter a new name for the project, just click the Save button.
After you save the project as a copy, if you’d like to rename it again, you can simply right-click on the project in the Project Manager once more, but this time, a new Rename… option will appear. Use that option to rename the project to anything you want.
Creating a New Project
While in the Project Manager, you can either click the New Project button down in the lower right corner or you can simply right-click in an empty area of the Projects panel. When you right click, a menu appears.
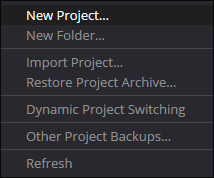
Choose the New Project… option and when you do, a Create New Project dialog box will appear.
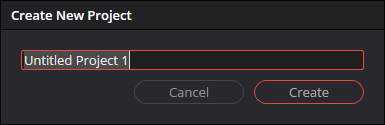
Enter the desired name of your project and click the Create button. Doing this will close the Project Manager and open the Resolve workspace.
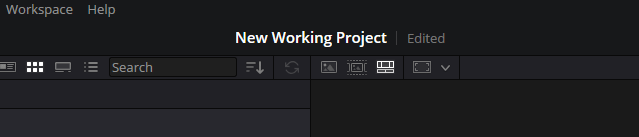
In my case, I created a new project with the name New Working Project. I can see the project name inside of the workspace, at the top center.
At this point, I can begin working on my project. And just as a side-note, if I ever want to return to the Project Manager, all I need to do is click the small Project Manager icon in the lower right corner of the Resolve workspace. It’s the one that looks like a house.
If I do that right now, I’ll see that the Untitled Project has disappeared and my New Working Project has appeared. That’s exactly what I wanted.

That’s it! If you have any questions regarding how to create a new project or rename a project in DaVinci Resolve, please ask down below. Thanks!
If you’d like to learn more, click through for all of my free DaVinci Resolve Tutorials.
Leave a Reply