As I’ve mentioned in previous tutorials, there are many tools available in the Cut page in Resolve. Most of the tools I’d like to discuss today are located in two places; either directly below the video clip in the monitor or inside of the Inspector. Today’s post is merely an introduction. It’s to demonstrate how easy it is to find these tools and what they actually are. In subsequent tutorials, I’ll cover exactly how to use each tool I discuss today.
Tools Beneath the Monitor
To start, I’d like to show you the tools that are located beneath the monitor. Many video editors (people) don’t even know these are here. They’re also located in the Inspector and that may be where most folks go to take advantage of them. But having the tools in this format and having them accessible and editable in such an intuitive way is extremely helpful. Take a look below.
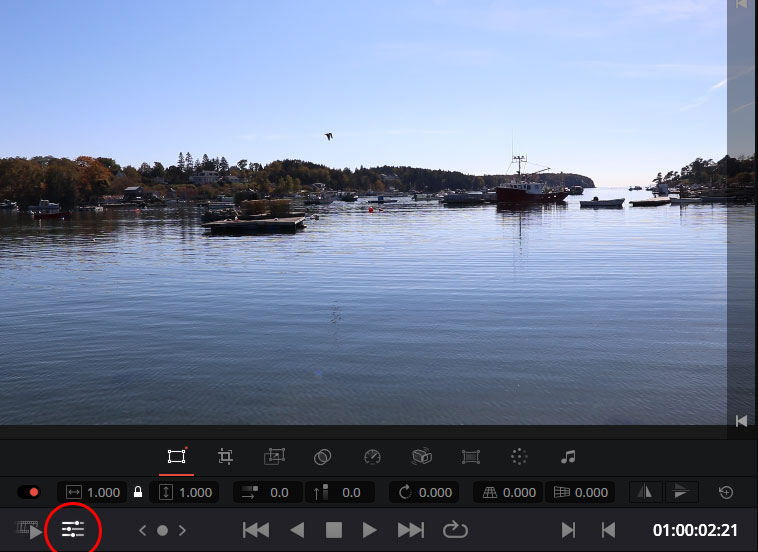
I circled the Tools button in red. If you hover over that button, you’ll see the Tools popup appear. The only way this button is live is to first have a clip selected in the timeline. If no clip is selected, then this button will remain grey and unable to be clicked.
Once the button is clicked, the toolbar will be revealed. The toolbar is right above the button.

If you’ll notice above, when a tool is selected, its properties will show below. Those properties are editable. The tool that’s currently selected is the Transform tool. The available tools in this toolbar are: Transform, Crop, Dynamic Zoom, Composite, Speed, Stabilization, Lens Correction, Color, and Audio. Click each tool and it’ll become editable. Remember though, each change you make in this toolbar only applies to the specific clip that was selected in the timeline, not all of the clips in the timeline.
Tools in the Inspector Panel
If you select a clip in the timeline and then open the Inspector by clicking the Inspector link in the upper right corner of the workspace, you’ll see many of the same tools. And interestingly enough, as you make edits with one tool, either in the monitor or the inspector, the other’s values will change in real time. They’re the same tools, just in different locations.

Comparing Tools
Just because there are seemingly duplicate sets of tools doesn’t mean that one set isn’t more versatile than the other. Let’s make a quick comparison of the Dynamic Zoom tool for a moment. Let’s first see what this tool’s settings look like in the Inspector:
Basically, only one property of this tool is able to be accessed in the Inspector. It’s the Ease property. The available options are Linear, Ease In, Ease Out, and Ease In and Out.
Now let’s take a look at the Dynamic Zoom properties able to be accessed in the monitor toolbar.

I outlined the available settings in red. They are: Zoom Preset, Pan Preset, Angle Preset, Swap, Linear, Ease In, and Ease In and Out. Both tools in both locations offer a Reset All option as well.
As you can see, the monitor toolbar offers more setting options, but that’s not all. Inside the monitor, we’re able to also click and drag these settings intuitively. We don’t need to just plug in numbers. So if you’re interested in editing by hand and sight, try out the monitor tools instead of the tools contained in the Inspector.
If you have any questions about the clip tools located in either the monitor or the Inspector, please ask in the comment section down below. Thanks!
If you’d like to learn more, click through for all of my free DaVinci Resolve Tutorials.
Leave a Reply