After adding in and out points for a video clip, the logical next step is to add the clip to a timeline. In order to do that, a new timeline needs to be created. Luckily, when adding a clip to a timeline, a timeline is created automatically by Resolve. It’s a very simple process.
Just Video? Just Audio? Both?
Before adding a clip to a timeline, you’ll need to think about what you’d exactly like to add. If you recorded a normal video that included audio, you may add both together to the timeline. You also have the option to add only the video to the timeline if the audio wasn’t important or you can add only the audio to the timeline if you don’t need the video. Resolve has wonderful technology that can separate out video from audio and vice-versa. On the Cut page in Resolve and directly below the Media Pool, to the left, are two buttons named Video Only and Audio Only. If clicked, they turn orange (that means active). Only one can be orange at any given time. Clicked once, one of the buttons will turn orange and clicked again, that button will turn gray (that means inactive).
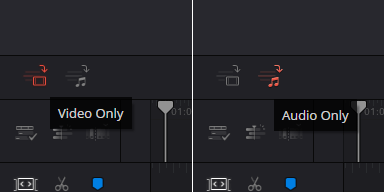
If neither are clicked, they’ll both remain gray, which means that any clip added to the timeline will include both video and audio.
Creating a New Timeline
There are a few options for creating a new timeline in the Cut page in DaVinci Resolve. The first is to right-click in the Media Pool Master bin and choose the Create New Timeline… option.
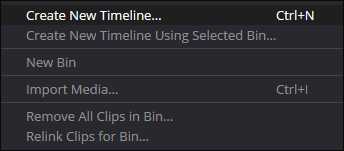
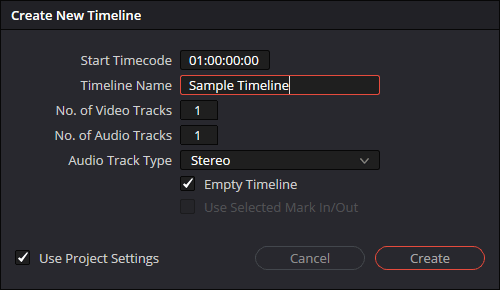
When that option is clicked, the Create New Timeline dialog box will appear. Fill in your information and then click the Create button.
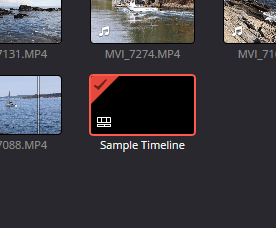
Doing this will create a new timeline thumbnail in the Master bin of the Media Pool. Timelines will always be held in the Master bin for easy location.
Deleting a Timeline
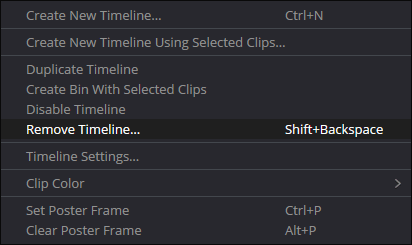
For this example, I’m actually going to create a timeline a different way, so I’ll delete this one. To delete the timeline, I’ll click its thumbnail once to select it and then I’ll either right-click and choose the Remove Timeline… option or simply click the Delete button on my keyboard.
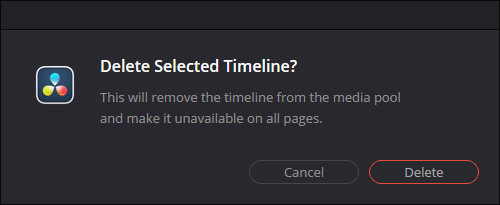
When I do this, the Delete Selected Timeline dialog box will appear. I’ll click the Delete button to remove the timeline from the Media Pool.
Dragging a Clip to Create a Timeline
The easiest method for creating a timeline in the Cut page of Resolve is to simply click the preview in the monitor and drag it down to the timeline panel beneath it. I just did that with my sample clip and this is what the workspace looks like now.
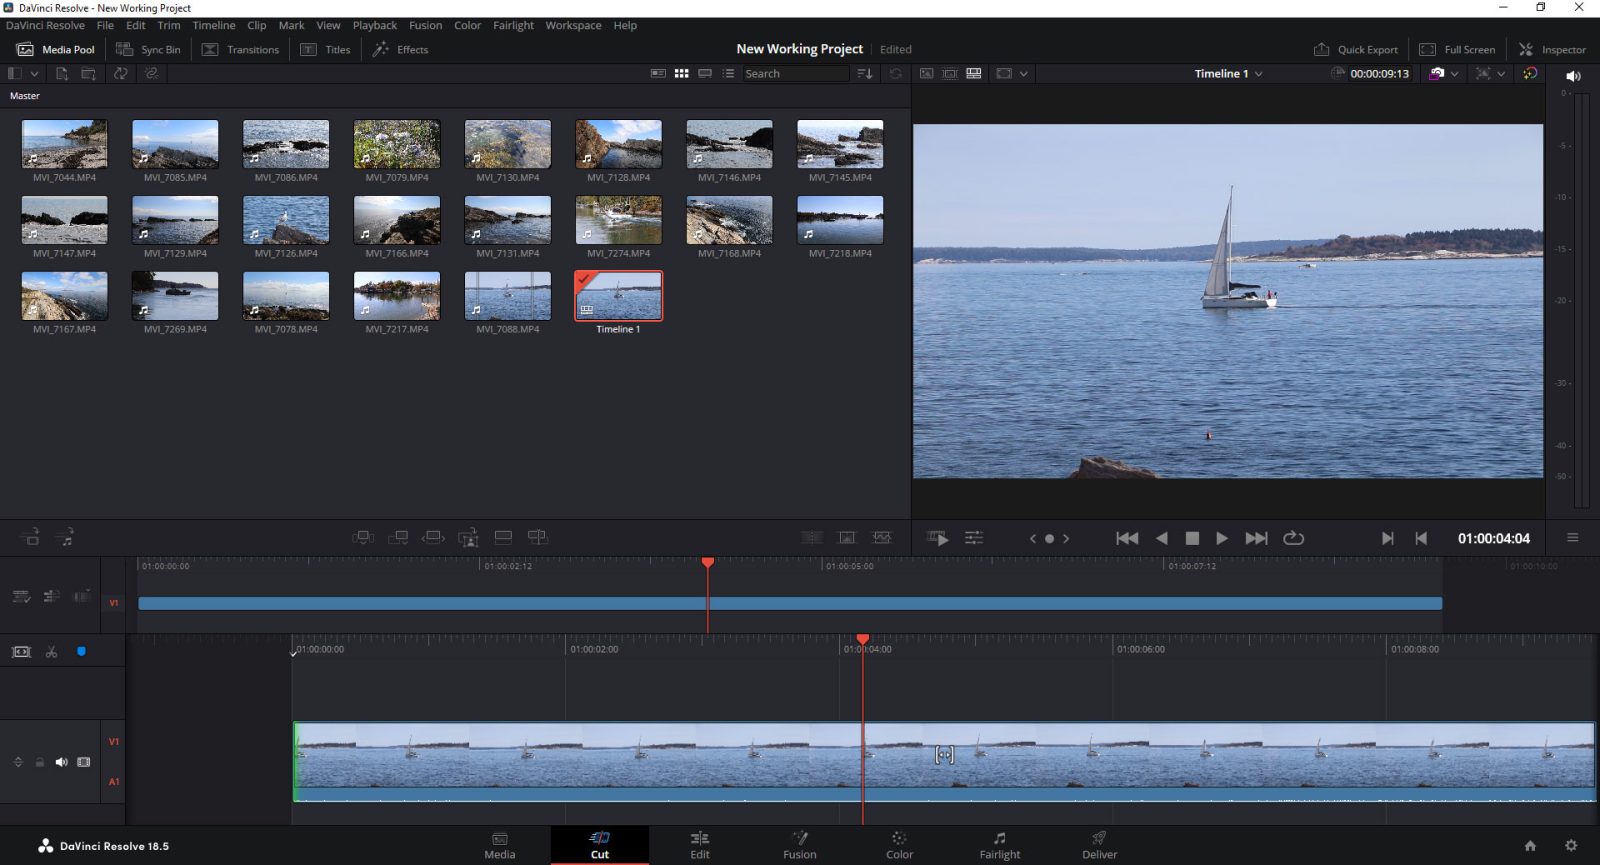
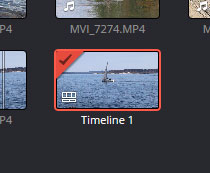
And if you’ll notice in the Media Pool, the new timeline thumbnail has an image inside of it. That means that the timeline is populated with at least one clip, whereas earlier, the timeline I created was empty, waiting for a clip to be inserted.
Adding Multiple Clips to the Timeline
If I want to add more than one clip to the timeline, all I need to do is continue clicking and dragging clips to that area. In my case, I’ll click and drag another clip down to the timeline, to the space after the first clip ends.
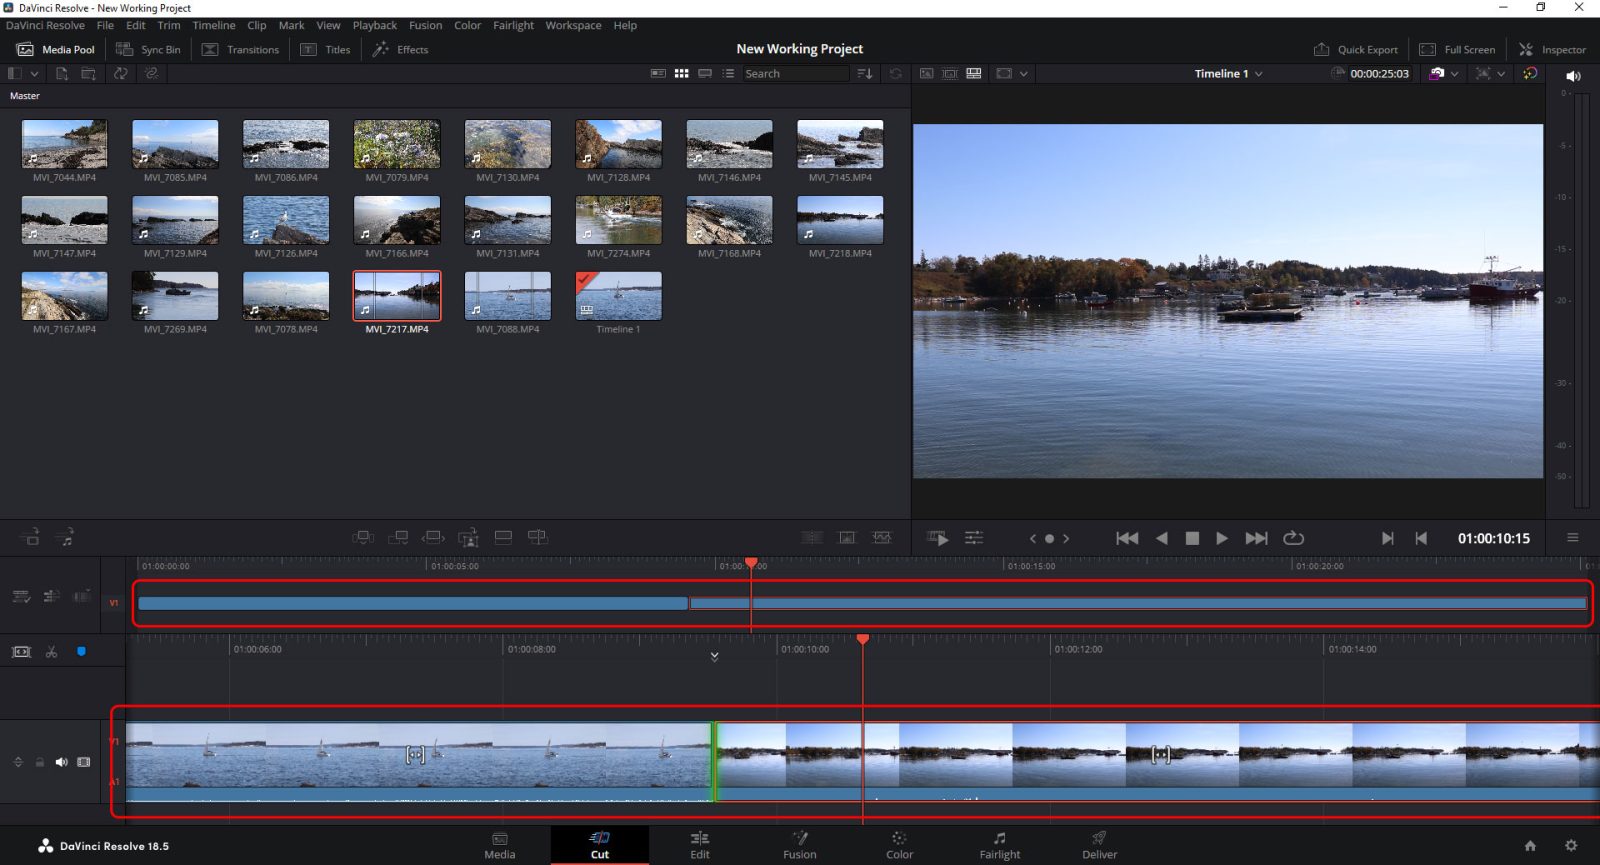
If you’ll notice in the below screenshot, there are two horizontal lines in the timeline panels toward the bottom of the workspace. The top blue line is the consolidated view of all the clips. No matter how many clips you have in the timeline, every single one of them will appear in that view, compressed. The upper timeline will never extend past the area of the workspace. This is extremely handy because you’ll have the ability to click and drag that upper playhead to quickly navigate to a specific spot on the timeline, as opposed to scrolling and scrolling. The bottom timeline is a larger, more drawn out, play by play view of the clips.
Appending a Clip to the End of the Timeline
In most projects, you’ll be working with many clips. The lower timeline will extend past the workspace quickly and if you were to click and drag each additional clip to the end of the timeline…well, that would become a messy situation quickly. It’s a pain to scroll that lower timeline around, back and forth. Just imagine working on a project and wanting to add an additional clip to the timeline. Each instance would require you to click and drag that lower timeline all the way to the end. No thanks.
Luckily, there’s a handy command inside of Resolve that allow us to quickly append a clip to the end of the timeline, fast and easily. In the toolbar directly below the Media Pool are a few buttons. One of them say Append when you hover over it with your mouse.
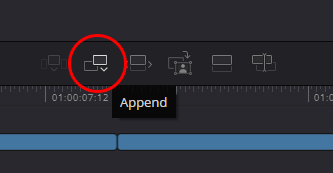
If you click a thumbnail once in the Media Pool to select it and then click on the Append button, that clip will automatically append to the end of the timeline. Perfect.
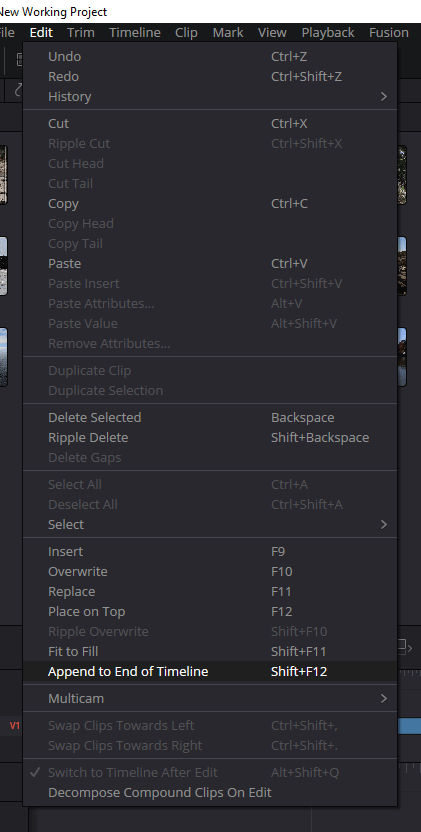
If you’d like to use the menu up top instead, you can navigate to Edit > Append to End of Timeline. The keyboard shortcut is Shift + F12.
Navigating the Timelines
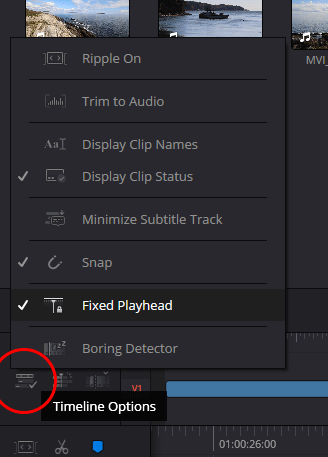
If you click the top timeline playhead and drag to the left and the right, you’ll notice that it moves freely. If you do the same thing to the bottom playhead, you’ll find that the playhead doesn’t move at all. The timeline actually moves. That’s an interesting feature that many people enjoy using. If you would prefer that the lower playhead moves as opposed to having the timeline itself move, you can change the setting for that.
To the left of the timeline is a dropdown menu. It’s called the Timeline Options menu. Click the button and then choose the Fixed Playhead option. This will unlock the lower timeline playhead so you can scroll it as you would normally expect you can.
I hope you enjoyed this tutorial of how to create a timeline and how to add clips to a timeline in the Cut page of DaVinci Resolve. If you have any questions, please ask down below in the comment section. Thanks!
If you’d like to learn more, click through for all of my free DaVinci Resolve Tutorials.
Leave a Reply