In a previous tutorial, I discussed how to add in and out points to a video clip. In and out points essentially trim a clip from its beginning and/or end, cutting away unnecessary footage. Adding in and out points to a clip before that clip is added to the timeline is a handy feature to have inside of Resolve. It keeps work clean and streamlined and that results in fast and accurate jobs completed.
There’s a small issue though – what if you added your in and out points and then dragged the clips down into the timeline. After reviewing them, you notice that you’d actually like to adjust the footage so the in point is a little one way and the out point is a little the other way. Is this type of adjustment available inside the timeline or would you need to delete the clip that’s in the timeline and start over again with new in and out points on the raw footage? Luckily, this type of adjustment is available and in this tutorial, I’ll show you how to adjust cuts right in the timeline.
Source Clip vs. Timeline Clip
I’d like to explain something very important before I begin the tutorial. It has to do with the separation of clips between those stored in the Media Pool and those that have been added to the timeline. If you make an edit (in and out points) to a clip in the Media Pool and then add that to the timeline, once it’s added to the timeline, it’s no longer connected in any way to the version in the Media Pool. So if you were to click on the clip thumbnail in the Media Pool and readjust the in and out points, that adjustment will have no effect on the timeline. Also, if you make an adjustment to the clip in the timeline, that adjustment will have no effect to the source clip in the Media Pool.
If you wanted to adjust your edit of the source clip and have that edit translate to the timeline, you’d need to first delete the clip from the timeline and then re-drag the source clip down there.
How to Ripple Edit in the Timeline
The Ripple Edit tool in DaVinci Resolve allows you to lengthen or shorten a clip while seamlessly moving the rest of your timeline to accommodate the edit. When you shorten a clip in the timeline, the rest of your footage will move up the timeline to close the gap you created. When you lengthen a clip in the timeline, the rest of your footage will be pushed down the timeline to give you the space you need. The Ripple Edit tool is very handy. Without it, when you shorten a clip, an empty space will form that will need to be deleted. When you lengthen a clip, you’ll overwrite the next clip in the timeline. Ripple editing avoids these situations.
Turning on the Ripple Edit Tool
If you’d like to ripple edit in Resolve, you’ll need to first turn the tool on. To the left of the top timeline is the Timeline Options button. Click that button and a menu will appear. Inside of the menu, click the Ripple On menu item.
Shortening & Lengthening a Clip in the Timeline
The process of shortening and lengthening clips in the timeline is super simple. Let’s first take a look at my version of Resolve to see what we’re working with. I have two clips in the timeline that I’ve added in and out points to earlier while in the monitor. Take note of three areas that are circled in red.
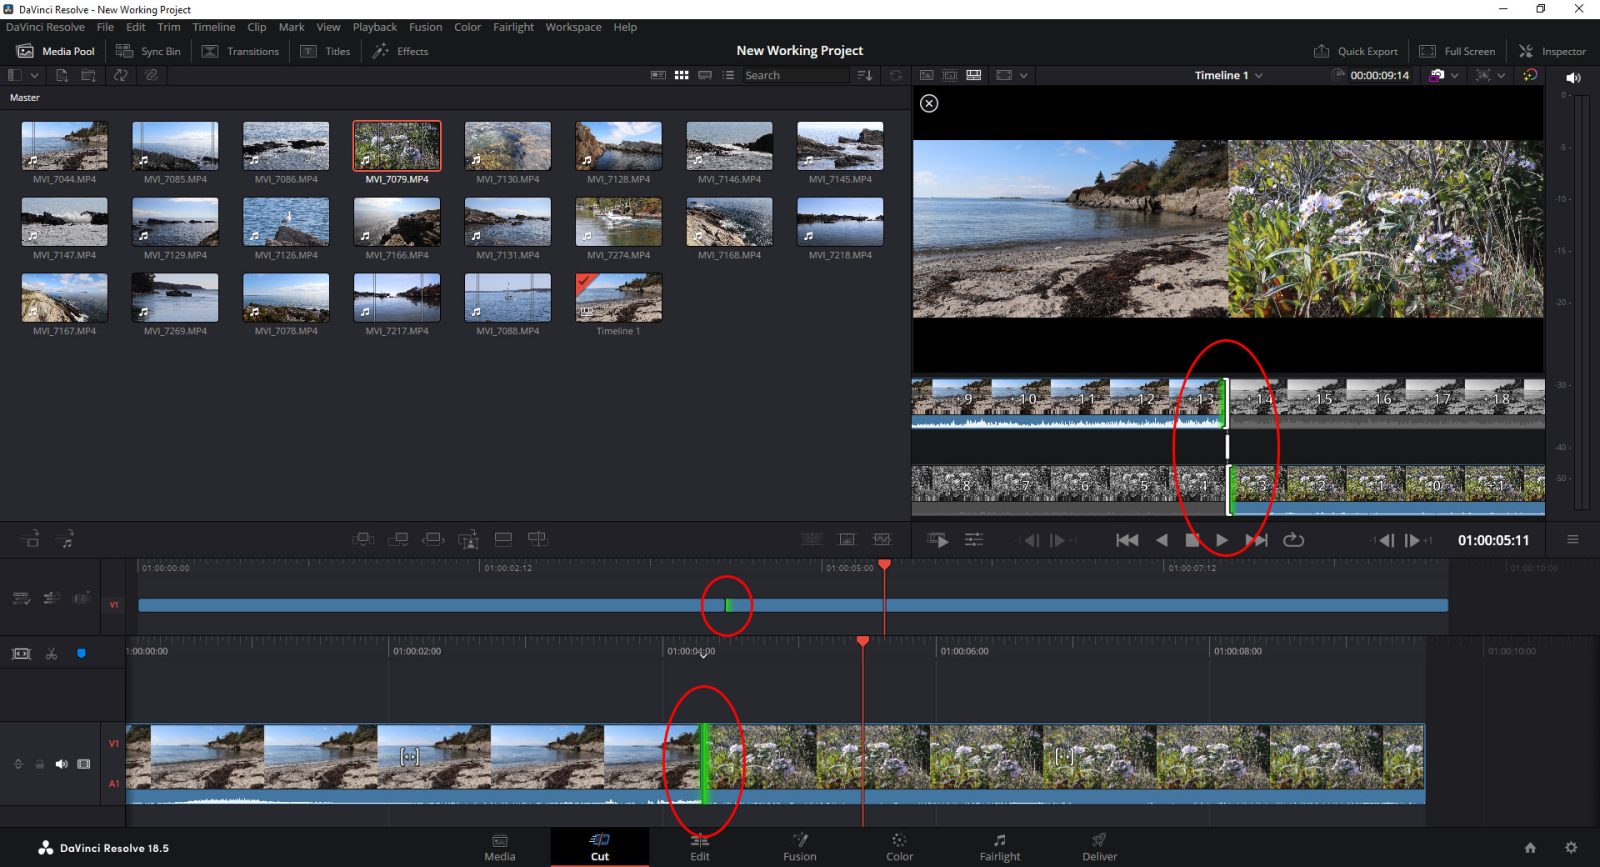
Do you see how the points between clips in all three areas are lime green? I did this simply by clicking on the separation point itself; the vertical line between clips. If I click on one clip in the timeline, I’ll see that one clip preview in the monitor above. If I click on both clips (the vertical line between clips), I’ll see both clips in the monitor.
To edit the clips in the timeline, I’ll hover my mouse pointer over the area just right of the beginning of a clip, just left of the ending of a clip or right on top of the transition between two clips.
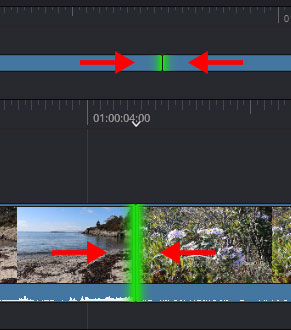
If you try this and hover your mouse over the areas indicated above, you’ll see your mouse pointer change. It’s at that point you’d click and drag to the left and right. You’ll see your timeline shrinking or growing, depending of what you’re dragging and in which direction. You’ll also see the video(s) in the monitor above moving. Which brings me to my next point…
Shortening & Lengthening a Clip in the Monitor
Adjusting clips in the monitor area is just as simple as in the timeline. Take a look at the graphic below.
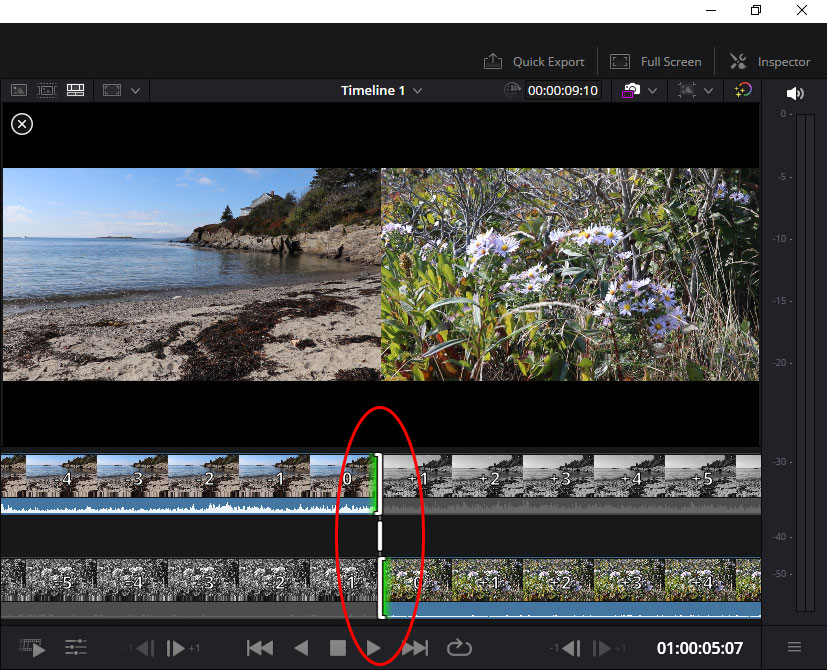
Notice the vertical white lines circled in red. If I click and drag on the top white line, I can adjust the length of the clip on the left. If I click on the bottom white line, I can adjust the length of the clip on the right. If I click and drag on the center white line, I can adjust both clips at the same time.
One thing you need to remember: You can only lengthen a clip as long as the clip is, meaning, if you added an out point earlier on, you can only lengthen the clip as long as that clips plays. So if you have a 30 second clip and trimmed ten seconds off the end by adding an out point at the 20 second mark, you can only click and drag that clip to the right for ten seconds. After that point, Resolve won’t let you continue dragging.
Playing Around Current Selection
After editing clips in the timeline, it’s always a good idea to play the clips back to see if you like your edits. For this particular edit, since it was around the transition point, it makes sense to play back around the selection. To do this, I’ll click on the transition point between clips, I’ll click the Loop button in the lower monitor toolbar, and then I’ll head up to the menu and select Playback, Play Around/To > Play Around Current Selection. The keyboard shortcut for this is the “/” key.
When I play, I’ll notice that the playback will only last a few seconds before the transition to only a few seconds after the transition. Then it will loop again and again until I press the Stop button beneath the monitor.
If you have any questions about how to ripple edit the length of a video clip in the timeline or monitor after the clip has already been added to the timeline, please ask in the comment section below. Thanks!
If you’d like to learn more, click through for all of my free DaVinci Resolve Tutorials.
Leave a Reply