In this post, I discuss a few different aspects of lighting for photography. As you may well imagine, the topic is deep. Because of this, I may keep this post ongoing, meaning, I’ll add to it over time. For now, enjoy and learn from the various perspectives I offer below.
Lighting for Studio Portrait Photography
Studio portrait photography is much different than the type of photography most amateur photographers engage in. It requires a certain skill set, some equipment and, of course, a studio. Or a room that’s equipped for this type of photography. Although many beginning photographers enjoy learning about nature and landscape shooting, studio and portrait work can be highly rewarding. Subjects are encapsulated in a “set.” They listen to direction. You can generally dictate what you’d like to happen and you can test, adjust, and capture your subjects.

Lighting Tips for Better Portrait Photography
In this section, I’d like to offer a few quick and easy tips that might just help you out when it comes to lighting and portrait work. Oftentimes, it’s the initial setup that beginners aren’t sure of and that’s where this post can help. I’ll describe a very simple lighting configuration and then I’ll talk about how you can move things around in an effort to make your subject look either flattering or fierce. Lighting is a huge factor when it comes to portrait photography and it should be treated as a primary one.
What Gear Do I Need For Simple Portraits?
I remember back when I first began experimenting with indoor photography. I really had no idea what I was looking for. I’d see videos online of professional studios with all their lights and cameras and I was totally intimidated. I remember not even wanting to try that type of photography out anymore. I figured that I’d just stay outside and shoot flowers and things. The truth of the matter is, you don’t need much to take incredible looking portrait shots inside.
Here’s what you need to start out with: one light, a stand and a diffuser with some sort of a stand to hold the diffuser in place. You could always use another person to hold it, but that can prove challenging at times. If you want to get fancy, you could also use a reflector to illuminate the shadowed areas, but that’s not a necessity. What is a necessity is the light and the stand and the diffuser. The stand holds up the light and the diffuser softens the light so it’s not harsh on your model.
Do you want to hear something really cool? You can get a light kit right now on Amazon for $64 that has the diffuser built right into what’s called a “soft box.” And they come with the stands. Yes, stands (that’s plural). There are two lights in this kit. I bought them a long time ago for my food photography and I still use them today. They are simple and just perfect for my uses. Of course, the stands aren’t twelve feet tall or anything and they’re pretty lightweight, but the lights certainly get the job done. It’s honestly one of the least expensive ways to get into portrait work. They’re effective and won’ break the bank.
As you get better with your photography, you can always upgrade your equipment. There’s no shortage of very expensive and very high quality lighting gear out there.
What Are the Best Portrait Lighting Angles?
As you first experiment with your portrait photography, you’re going to take a lot of very ugly pictures of people. Everyone goes through this. The most likely reason for this is the lighting angle you’re working with. If you were to place the light directly over someone’s head, facing downward, they would end up looking horrible. If you placed the light directly underneath them, facing upward, the same thing would happen. Terrible shot. Angles matter and they make all the difference in the world.
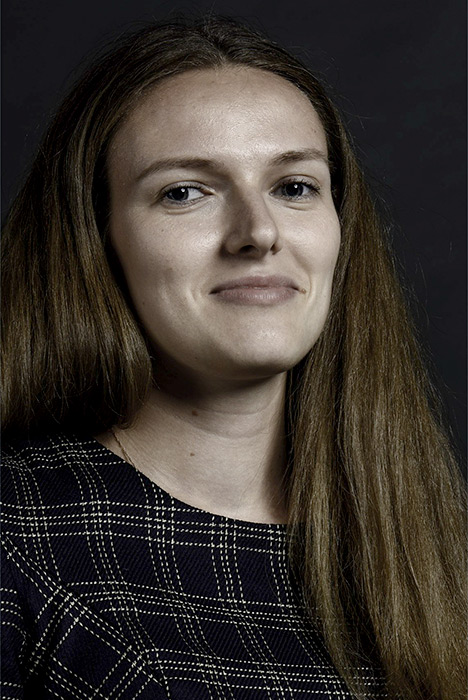
Take a look at this next photo. You can clearly tell where the light is for this shot. It’s almost directly in front of the girl in the photo.

The center light position is one of the most flattering positions for portrait work. That’s why you see this type of setup with school pictures. The kids want to look good. And again, all that’s needed is one light, a stand and a diffuser. With one light facing directly at the person, head on, many wrinkles and irregularities on someone’s face won’t show at all. If you used sharp angles for your lighting, any irregularities would actually be accentuated. That’s not a good thing, unless that’s what you’re going for.
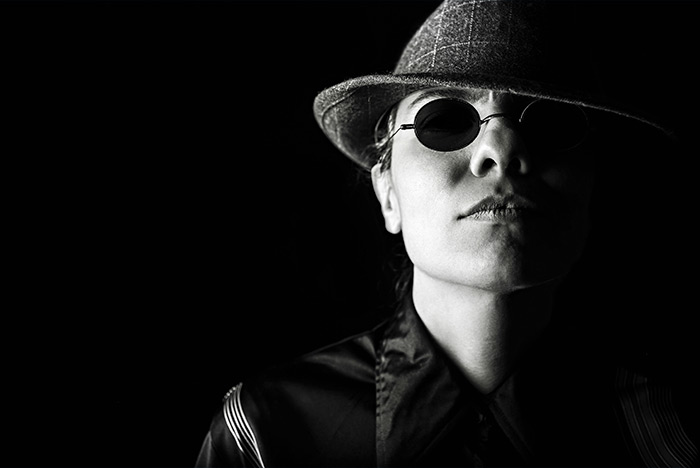
I want you to take a look at the first photo in this post. This photo was taken with a single light that was placed off to the side as opposed to directly in front of the model. While I think this image looks very good, many folks will think it’s dramatic and that the lighting angle isn’t good for everyday use. I’d agree with them because it’s not for everyday use. Or for every photographer. This is a bold lighting angle that’s meant to evoke some sort of a feeling. You certainly wouldn’t want to do a family portrait with this lighting angle. Can you imagine?
So to recap, one light facing head on is flattering and one light off directly to the side creates drama. And your models will need to match the angle. Look at the two different types of people in the photos above. They both match the lighting setup and the feeling the photo gives.
Using a Reflector
Reflectors look just like diffusers and you can get a diffuser/reflector kit for not much money on Amazon as well. There are many kits for sale for as little as $20. You can’t beat that!
The reason I like reflectors so much is because they only reflect a portion of radiance that the light gives off, which not only fills in the shadows, but keeps the lighting soft as well. You’ll need either another stand to hold the reflector or a person standing there with it in their hand, but as you’re finding out, this photography gear is really inexpensive these days.
What’s very handy about the reflector is that they’re so easy to move around for the perfect look. You won’t get what you want right off the bat, but with some trial and error, I’m sure you’ll fall in love with your lighting soon enough.
Have a Light, but Not a Diffuser?
Sometimes people haven’t gotten around to picking up a diffuser yet, but need to take a portrait photo. I’m here to tell you that a good substitute for a diffuser is a white bed sheet or a tablecloth. As long as both of these things aren’t too thick, they’ll do a great job at scattering the harsh rays a direct light can give off. Again, you’ll need a stand to hang these things over or for someone to hold them, but that’s easy enough to figure out.
Experimenting & Moving the Model
Trust me when I say this; you’re not likely to get the perfect shot as soon as someone enters the area you’re planning on taking your photos. Unless, of course, you’ve done this a zillion times and know the exact spot in which they should stand. Because we’re not experts here, you’ll need to do a lot of experimentation with your diffusing and your lighting angles. The easiest thing to do, as opposed to moving your light, is to move the model. Have the person turn slightly so you can get an idea of what they look like at different angles. You might be surprised how lighting affects different people. Some angles make people look very attractive and some angle make even the best looking of us look not so great.
Experimenting & Moving the Camera
I just wrote about experimentation with moving the model and now I’m going to write about trying things out by moving the camera. This is one of the most powerful changes you can make with portrait photography. As you change camera position around your model, you’ll see entirely new appearances open up. For this technique, you’ll ask your model to stay completely still while you hand hold your camera to gauge what looks best. You’ll walk your camera around the model and once you find the best look, keep your model where they are and set your camera up on the tripod in its new position. Then, have at it and take your photos.
When working with lighting, the key is experimentation. It’s not a very difficult skill to pick up and learn, but you will need to practice and get used to what’s necessary to accomplish your goals. As I mentioned above, the equipment isn’t expensive, so what’s truly important here is that you set things up, pick up your camera and start shooting. If you don’t have people to experiment on, use a doll or an object of some sort. Or just go over and ask a neighbor. I’m sure there’s someone who would be will to help out a friend.
I hope I gave you some good pointers on how to get started with portrait photography lighting. If you have any questions around this section, please let me know in the comment section down below.
How to Best Work with Light in Your Photography
There’s a lot that goes into photography. As you gain experience, you may not even notice what you put into it. Think about composition for instance. When was the last time you really thought about composition? I’m not sure I can remember my last time. That’s not to say that I don’t think about it. It just means that I don’t consciously think about it. I’ve gotten to the point in my photography that I have a feel for things and I don’t have to sit and consider them for very long.
If you think about the four elements of what makes a great photo; light, composition, subject and timing, you’ll find that each of these elements is thought about less and less as you get better and better at what you do. I already mentioned composition, but I’d say the same is true for subject and timing as well. Subject is easier to deal with than timing is, but the one that still trips me up is light. Light can make or break a photo and it’s something that needs to be thought about because it can be ever changing when outdoors in nature.
We already know that composition is where it’s at with photography. Some photographers choose to stand and take a photo of an average leaf at eye height, straight on. Others prefer to lie on their backs while pointing their camera straight up at the bottom of the leaf. The second group of photographers would most likely capture a more interesting photograph because he/she took it from an angle from which we don’t often see things. That’s the trick when it comes to composition. People like images of things they don’t often see. Either that or of things that are just so beautiful that it doesn’t matter if we’ve seen them before. This is what we’d refer to as a strong composition.
Let’s get to the subject of light. Light is everywhere. It can stem from the foreground, background, underneath, above and just about anywhere else in a scene. The challenge is to harness and control that light so it better serves your subject. Light can detract from and emphasize a subject and it’s important to consider this when photographing. The question is, how can we use the light to make our photos interesting for others to view and to make us, as photographers, proud of our shots?
Below, I’ll discuss a few methods and tricks that I think you’ll find useful when dealing with light in your photography.
1. Use light to give your photo focus. Think about taking a picture from the top of a mountain, across a landscape with a lake below. Beautiful scene, right? Now think about that photo being taken on a cloudy day. Still beautiful? Probably not. Now think about those clouds breaking up to reveal a few rays of sunshine hitting the lake in the landscape down below. Okay, now we’re getting somewhere. Have you ever seen rays of sunshine that hit a side of a mountain, a valley or some other natural feature that would otherwise be sort of boring? The light wakes things right up and draws the viewer’s eye directly towards the area in which it’s shining. So, use that light as the focus of your shots. It won’t be available all the time, but when it is, you better have your camera in hand.
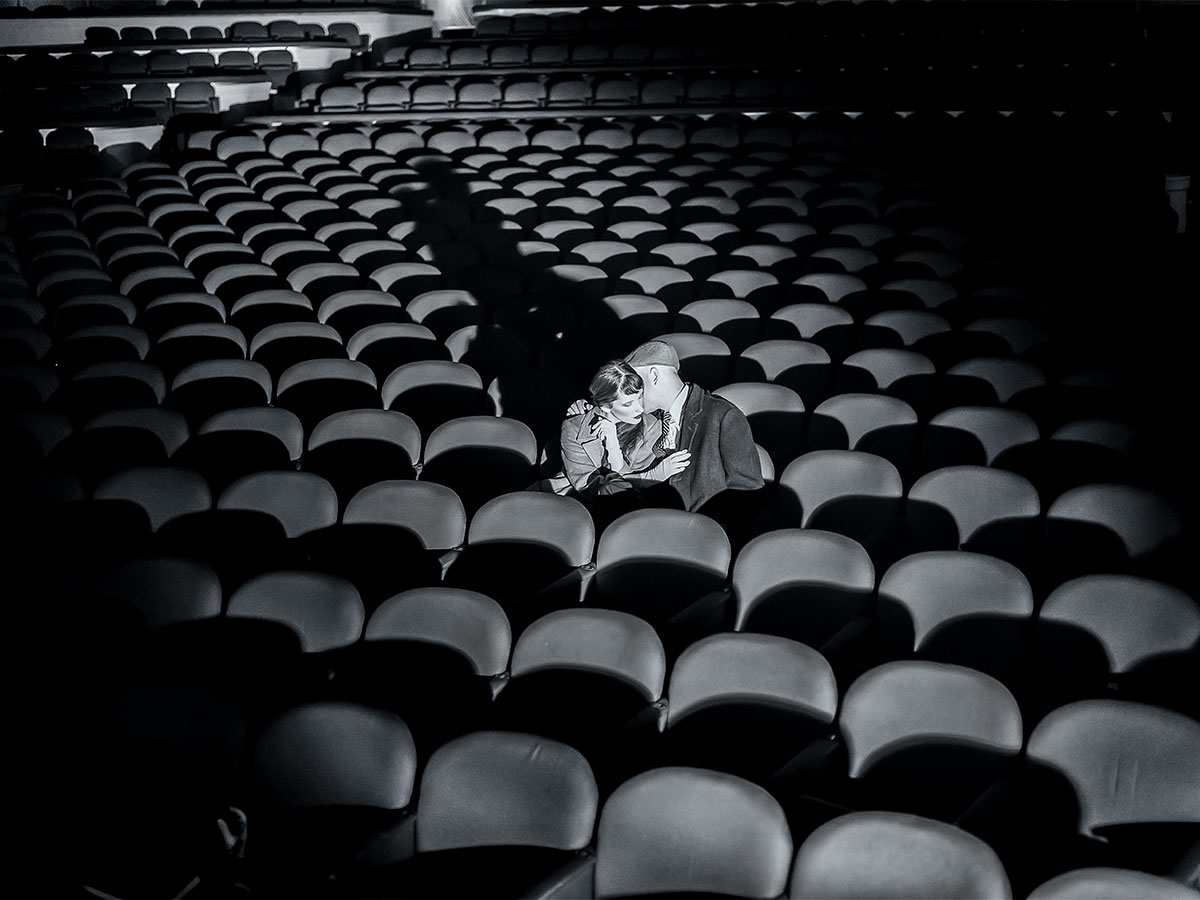
2. Shadows are your friends. Oftentimes, light creates interesting shadows. Take a look at this photograph.

Need I say more? Can you imagine this shot without the light or the shadows? If you think about how shadows work, you’ll find that they are truly dynamic creatures. They change and they lead the viewer’s eye into their source. Shadows create lines and can section off parts of a scene to emphasize other parts. Use them to your advantage.
3. Light creates color. I think one of the most depressing things about mid-winter is the lack of color. Oftentimes, winter days are cloudy and dreary and it’s the lack of light and resulting color that gets folks down. It’s not until there’s a break in the clouds and the sun shines through that people say, “Hey, winter isn’t so bad after all.” It’s true, when the sun shines, color appears. When it comes to photography, you should take advantage of the color that light creates. Light doesn’t simply shine on things. It actually creates contrasting and complementary colors as a result of its shining. If you take a look at the image above once more, you’ll find and orange color on the snow with a blue sky. Does this day appear to be dull and dreary? I don’t think so. So find the color that light produces and take your photos based on those colors.
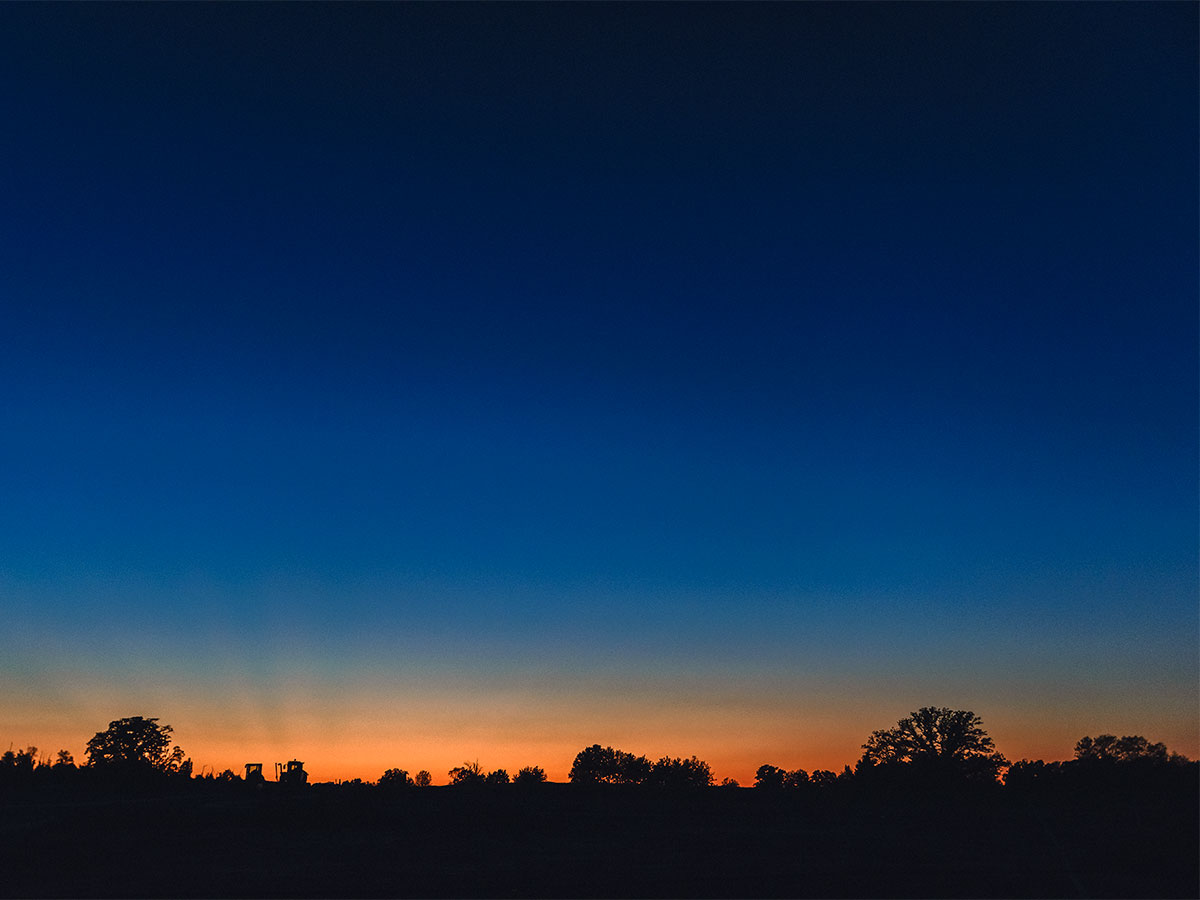
Remember, light doesn’t always need to be overt or intrusive to be noticed. It can consist of a mere glow that accentuates other objects in a scene. Take a look at this photo that was taken during the blue hour, after the sun went down. If you look closely, you’ll see stars in this shot. the true beauty though, lies in the tree line that’s set against the sky.

4. The result of angled light on a rough surface is texture. Next time you’re hiking in the snow as the sun is going down, kneel down close to the snow. Take a careful look at all the tiny shadows that have formed because of the angle of the sun. If you were to do this at high noon, you wouldn’t see any shadows, but since you’re doing it during the golden hour, you’ll likely see a texture across the surface of the snow.
You’re not limited to the snow when it comes to engaging in an exercise like this. Texture can be found almost anywhere in nature; on the bark of a tree, ripples of water in a stream, almost anywhere you look at closely enough. Use the light that’s at an angle to discover new textures that you may not have seen otherwise.
5. Don’t get hung up on bad light. I’m sure you’ve said to yourself at one point or another, “Man, this light is terrible.” I know. I’ve been there a thousand times. I used to get completely bummed when my chosen photography day would be overcast or completely rained out. The thing is, bad light can produce wonderful images. Have you ever seen photography that was taken on a rainy day? Or maybe a cloudy day? Fog? Mist? Were those shots nice? I think some of them are lovely if captured correctly. They are moody and depressing and everything in between. Photography doesn’t always need to be uplifting and stunning. Sometimes it can be somber and sad. Something like a photo of friends and relatives standing at a funeral in the rain. That would be appropriate because the mood of the day and the actual event would match the lighting and the rain. You wouldn’t want cheerful sunshine in an image like that.
Also, overcast days are perfect for long exposure photography. If you take these types of images in the sunshine, you’ll get high peaks and low valleys on your histogram. If you, say, take a long exposure photo of a waterfall on a cloudy day, your dynamic range will be much easier to work with during post-processing.
6. Consider your direction. Light can come from four places; top, side, front and back. Each direction dictates where you want to take your shot from. If the light is coming directly from above and you’re photographing a flower, you might want to shoot straight down or straight up. If it’s coming from the side, you’ll want to shoot from the side as well, capturing the light on one side of your subject and a shadow on the other. This creates contrast. My favorite by far is backlighting. I love it when the sun shines through the trees directly at me. Those trees break the sun up and form rays that I find appealing. I’ve also taken tons of shots that were directly into the sun when it hangs low in the sky. I know people shy away from doing that, but I love it. Talk about creating a mood.
7. Atmosphere creates depth. If you’ve got mist in the air, you’re in for a treat if you’re out there photographing. When the light hits the mist, an atmosphere is created and you’ll see all sorts of depth. Depth is wonderful for photography because it, again, creates mood. And feeling. And that’s what it’s all about. Atmosphere and fog also separate subjects from one another in a scene and diffuses the light in the atmosphere so the resulting photo is somewhat softer than it would have been if the fog or atmosphere wasn’t present. The results can be beautiful.
Using Reflector For Shady/Uneven Outdoor Lighting
In this section, I offer you a tip. If you’ve ever been in the type of situation where you’ve tried to photograph someone outside in mixed sunlight and shade, you most likely know the difficulties of which I’m about to refer. Let’s say you’ve got light streaming through some trees and your subject is standing beneath those trees. They are standing in partial sun and shade, which is making their face appear darkened far too much. Or, their face is too bright on one side and too dark on the other, offering way too much contrast. Or even, your subject is standing in the shade, but the background of the scene is in full sun, darkening your entire subject. Scenes like these are very annoying because the conditions can ruin otherwise beautiful settings. And really, all you need is a bit of light on your subject’s face. Just to brighten things up somewhat.
So here’s the question: what would a professional photographer do in situations like those I described above? Well, for starters, they’d take full advantage of of a light reflector. You know, the kinds that have white on one side and gold or silver on the other. Generally, the pros use rather large reflectors that measure approximately three feet across to add additional light to a scene. For amateurs like us though, all we need is a 12 inch reflector to solve the types of problems I was talking about earlier. These smaller sized reflectors can fold up to fit in a pocket. They’re very cool. And really, we don’t need to go out and buy a real photography reflector when a small foam board with tin foil would work very well. Even a white piece of paper would work well in a pinch.
With reflector in hand, all you need to do is find a ray of sun, place the reflector in its path and angle the reflector at your model’s face so it’s brightened up some. Trust me, this can work wonders. If you’re closer to your model (which can be a person, flower or whatever), you can use the white side of the reflector for a more muted effect. If you’re farther away, use the silver or gold side. The more reflective sides can cast light pretty far, so be sure to experiment.
I’ve always liked reflective light so much more than direct light, unless of course, it’s natural light. Reflective light is softer and so beautiful, especially when it’s mixed with natural light outside. I think this technique of using a small reflector outside would be great when taking photos of flowers, insects, birds on a feeder and other small objects that are in a fixed setting.
One of the most profound changes one of these reflectors can have on a scene is how it can brighten up the dark side of a model’s face when he or she is standing in direct sunlight. If one side of their face is super bright and the other is dark, the resulting photo isn’t going to come out looking very good. It’s much better to use a reflector to add light to the dark side of the face while the photo is being taken. Even though some darkness can be brightened up in post-processing, the quality of the shot will be better if the light is added beforehand.
What do you use to add light to a scene? Do you have any hacks or tricks you’d like to share? If so, please do so below. Thanks!

Leave a Reply