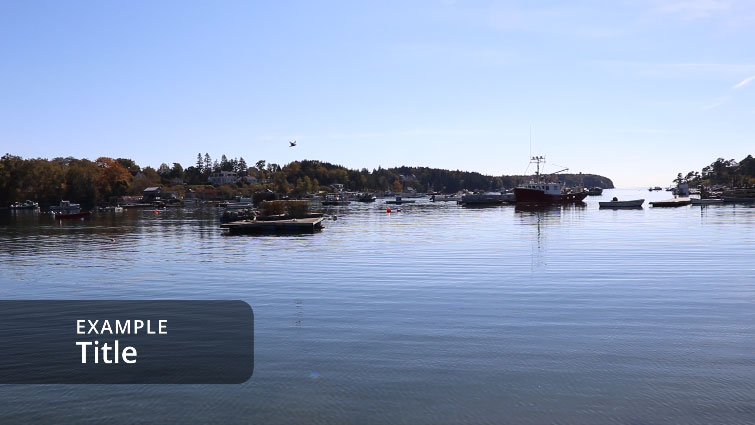
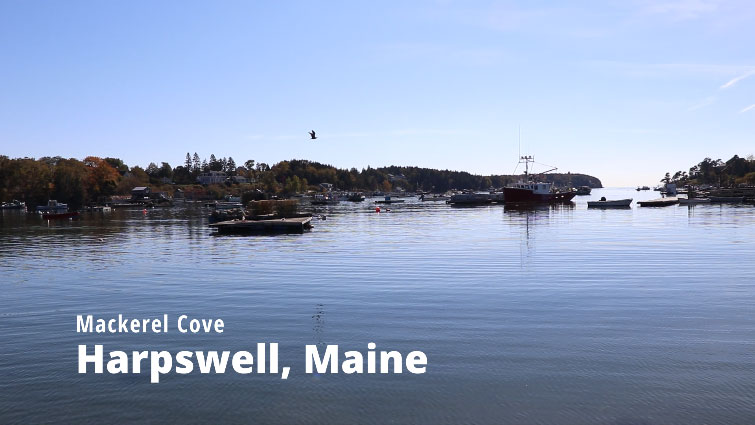
Have you ever seen introductory text in a video? Or text that appears in the lower third section of a video? In Resolve, this type of text is called a Title, or Titles, and it’s something I thought was terribly difficult to add and work with – until I learned how to use just a few tools and perform a few commands. This is an example of a lower third in a video.
Inside of Resolve, there’s an entire apparatus that handles adding and managing titles. The great part of it all is that it’s extremely simple to add text to a video. Back when I first began editing video, I avoided text because it seemed complicated to deal with. But after learning Resolve, I’ve been adding titles and text like it’s going out of style. Talk about easy.
In this tutorial, I’ll work through a quick project. During my work, I’ll demonstrate exactly how to add a lower third title to a video, customize the title, and then animate it. If you decide to follow along, the first time doing something like this will take about 15 minutes. The second time, though, will take about two minutes. That’s how shallow the learning curve is.
The Titles Panel
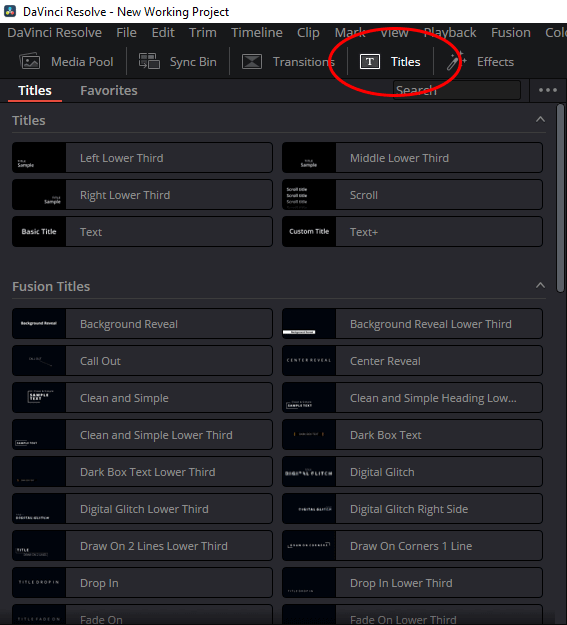
To start things off, let’s take a look at the Titles panel in Resolve. To access it, I’ll head to the upper left corner of the workspace and click the Titles link. From there, I’ll see a panel appear that contains three different types of titles; Titles, Fusion Titles, and Subtitles.
How to Preview Titles
To preview a specific title, all you need to do is hover your mouse pointer over a specific title in the Titles panel. If you float the pointer over the title, and move it from left to right, you’ll first see the position of the title and then how the animation plays out, if there is an animation. This is an example of the Middle Lower Third title in the monitor. While previewing a basic standard title, the background of the monitor will be black and the title will be white.

This is an example of the Clean and Simple Fusion title. This one is animated while previewing it in Resolve.

How to Add a Title to the Timeline
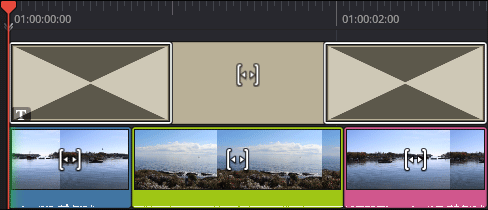
I currently have a project started that already has three video clips in the timeline. To add a title to the timeline, I’ll click and drag the desired title from the Titles panel down to the area directly above the current clips. In this case, I’ll choose the Left Lower Third title to work with. In the graphic below, the colored boxes are the video clips and the tan box above them is the title. To add that title, I simply clicked, dragged, and dropped.
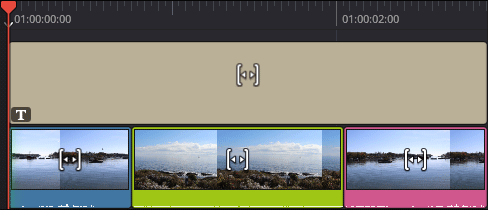
When this title was added, the default duration was five seconds. I clicked and dragged the right side of the tan title box to the left to shorten the duration so it matched the length of the three clips. Mind you, it’s just as easy to lengthen a title duration as it is to shorten it. To lengthen it, simple drag it to the right as opposed to the left.
Editing a Title in the Inspector
Believe it or not, just by adding the title to the timeline, about half the task is complete. I told you this process was simple.
Now that the title is added to the timeline (video), I can use the Inspector panel to edit how it looks and what the text reads. To start, I’ll head to the upper right corner of the workspace and click the Inspector link. From there, I’ll see all of the available properties for this particular title.
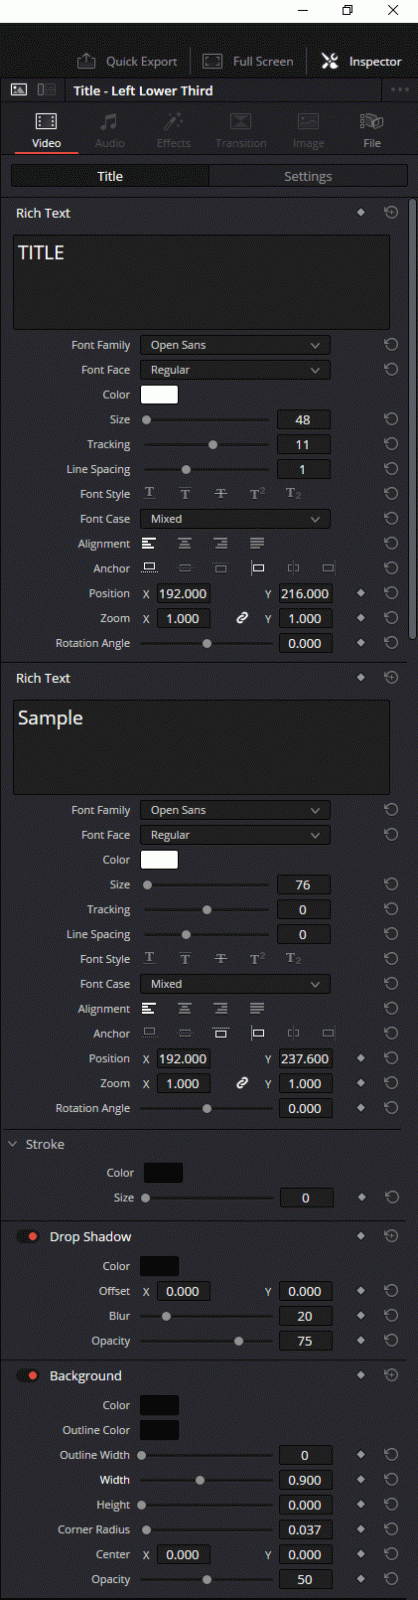
If you’ve ever used Microsoft Word or Adobe Photoshop, the property settings for titles in the Inspector panel of Resolve will look familiar. They’re sort of a combination of both.
For this project, I’ll first edit the text in the two text boxes. Then I’ll change the fonts in the two text boxes to Open Sans Condensed and Open Sans Extrabold, respectively. I’ll then increase the font sizes to 60 and 100, respectively. This is what I have so far.
That actually looks good by itself, but I’d like to change a few more properties.
I’d like to add a bit of a drop shadow, so I’ll scroll down to the Drop Shadow section and change the Offset X value to 5 and the Y value to -5. After that, I’ll continue scrolling down to the Background section and change the Width to 1.150, the Height to .250, and the Center Y to -40. This is what the final product looks like.
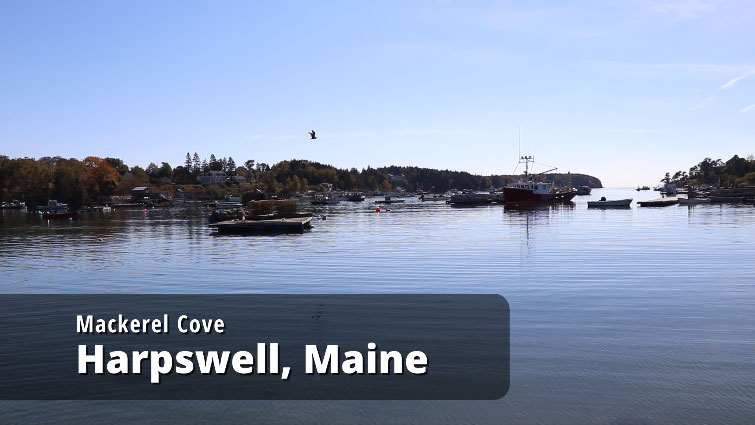
I’d say this looks pretty good. The only problem is that it’s extremely boring. To finish this lower third, I’d like to animate it so it enters from the left in a blur and then quickly exits to the left a few seconds later.
How to Animate a Title (Text) in DaVinci Resolve
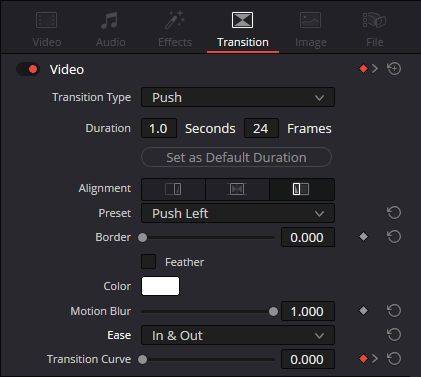
To accomplish this animation, I’ll head to the Transitions link in the upper left portion of the workspace and click. That will open the Transitions panel and from there, I’ll choose the Push transition.
FYI – Adding a transition to a title is very much like adding a transition to a video clip. All you need to do is drag and drop the transition into the title in the timeline. Since I’d like to animate the title on the way in and out, I’ll drag and drop the Push transition on the timeline twice; once at the beginning of the title and once at the end. This is what it’ll look like on the timeline. Notice the two rectangles in the tan bar.
If I select each transition in the timeline, I’ll be able to edit it in the Inspector. In this case, for the beginning transition, I’ll change the Motion Blur value to 1 and the Ease value to In & Out. For the ending transition, I’ll make those same edits, but in addition, I’ll change the Preset drop-downto Push Right.
Basically, what these settings will do is make the title, along with its background, push in from the left at the beginning of the video and then push out to the left at the end of the video. During both transitions, the text will blur. It’s a fantastic effect.
I want to mention one last thing about animating text in Resolve. If I simply click on a transition in the timeline, I’ll see this in the Inspector:
This panel shows the property values for one transition. If I click outside of any transition in the timeline and click the tan title bar itself, this is what I’ll see in the Inspector panel:
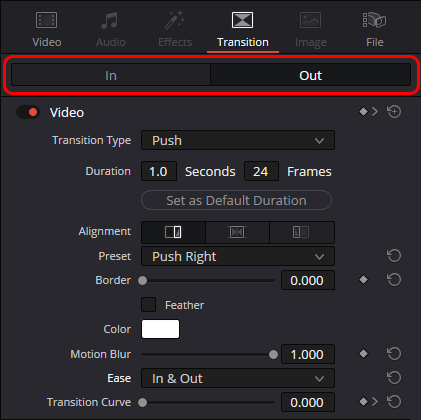
Notice the In and Out buttons inside of the red outline. When clicking on the title itself in the timeline, I can control the values of both transitions right in the Inspector panel as opposed to having to click on each transition in the timeline.
Let’s take a look at the final video demo. This is the completed animated lower third title in DaVinci Resolve.
If you have any questions regarding how to add a title to the timeline and then animate it with a transition in DaVinci Resolve, please ask in the comment section down below. Thanks!
If you’d like to learn more, click through for all of my free DaVinci Resolve Tutorials.
Leave a Reply